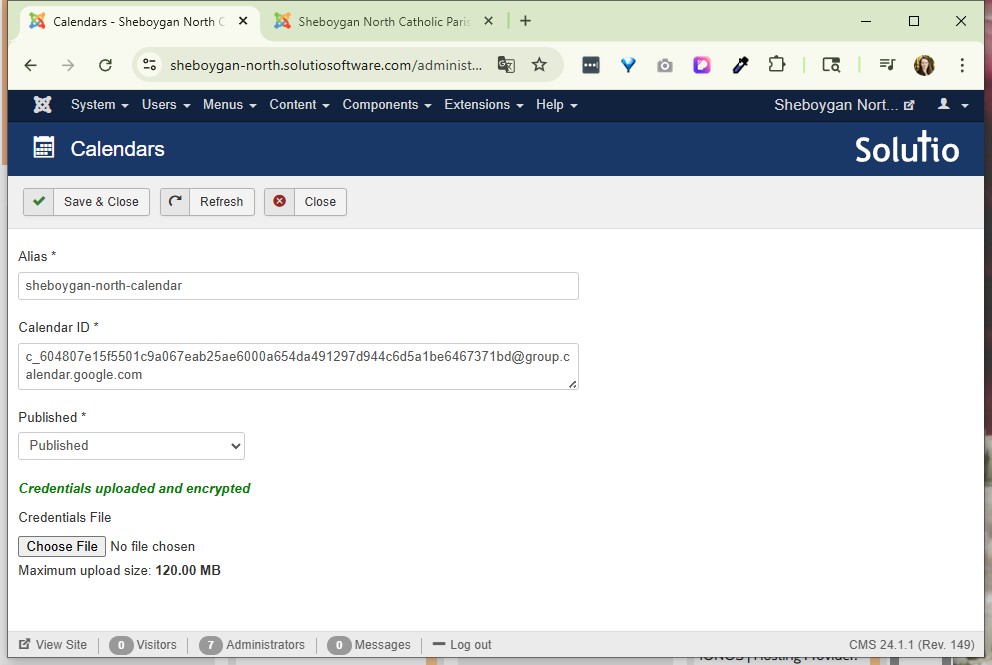
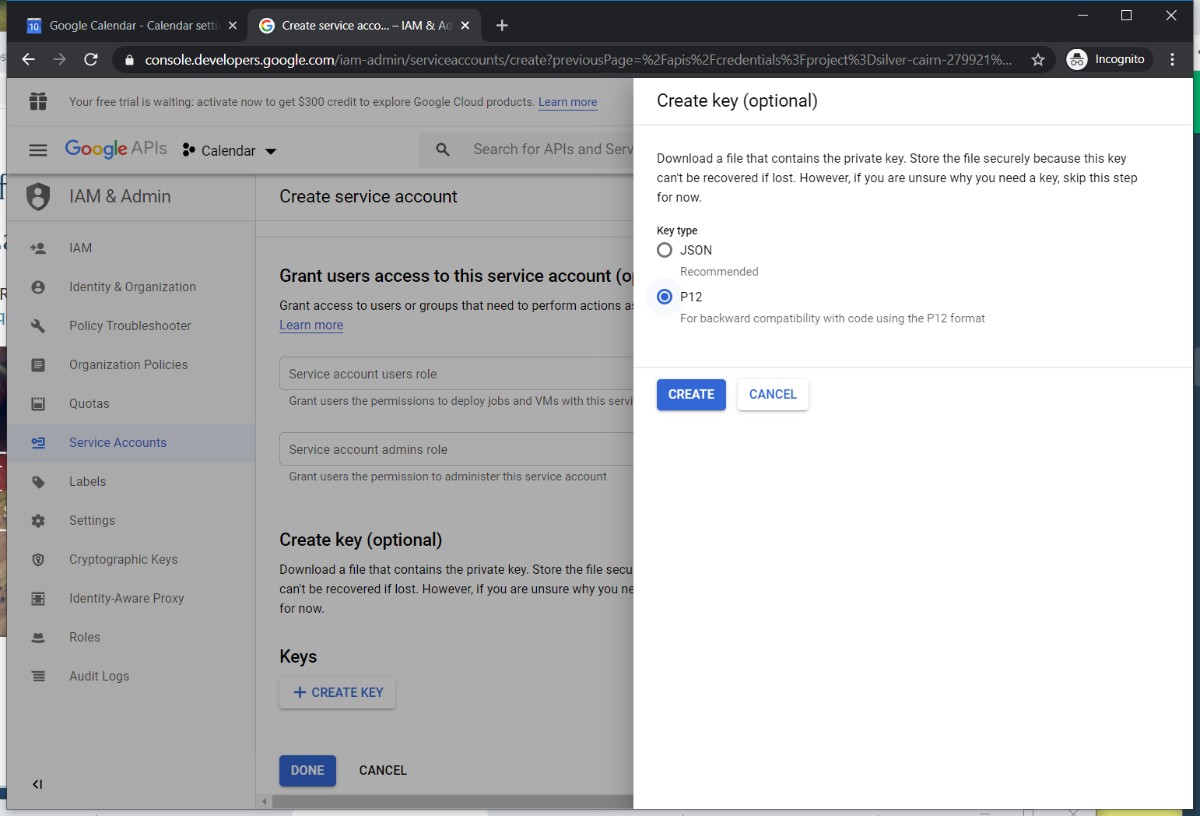
Go through the same API settings as before. Generate a json instead of a p12 file.
1. Google Developers Console.
https://console.cloud.google.com/apis/dashboard?inv=1&invt=Ab0SpQ&project=sheboygan-north&supportedpurview=project
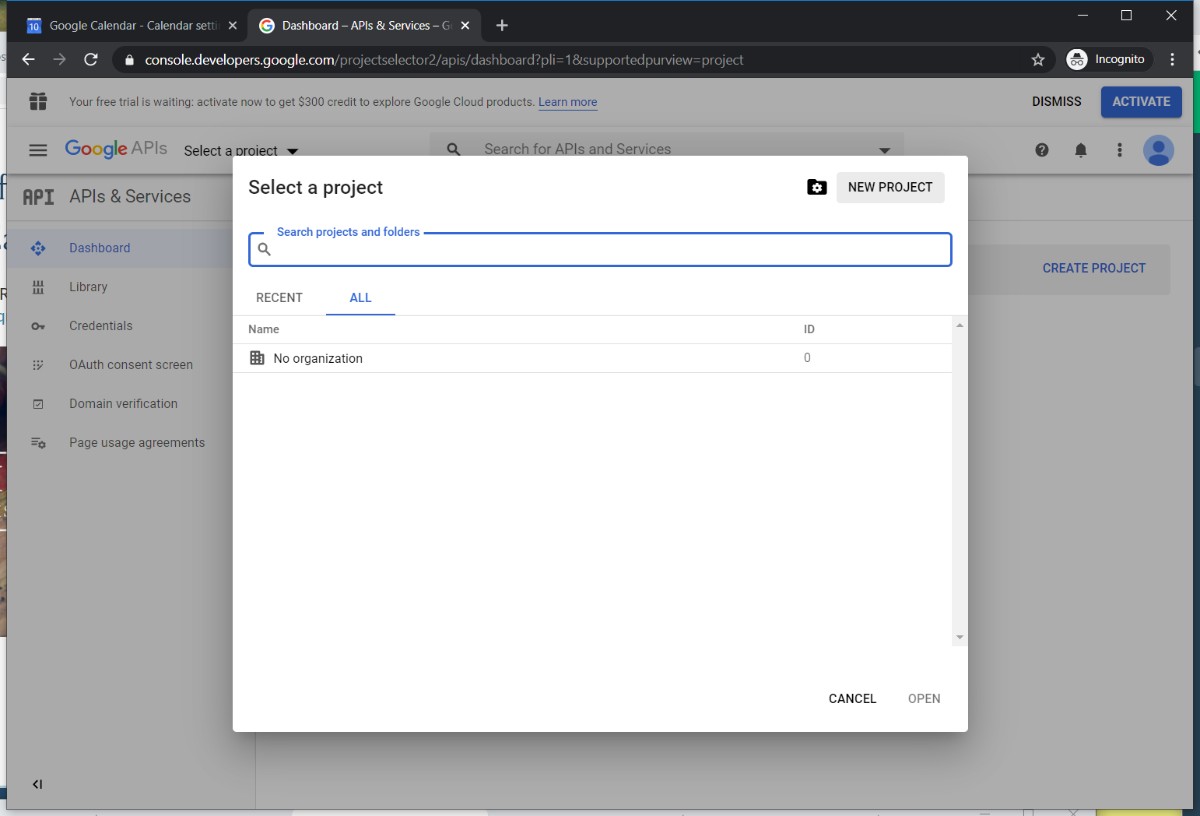
2. Create new project
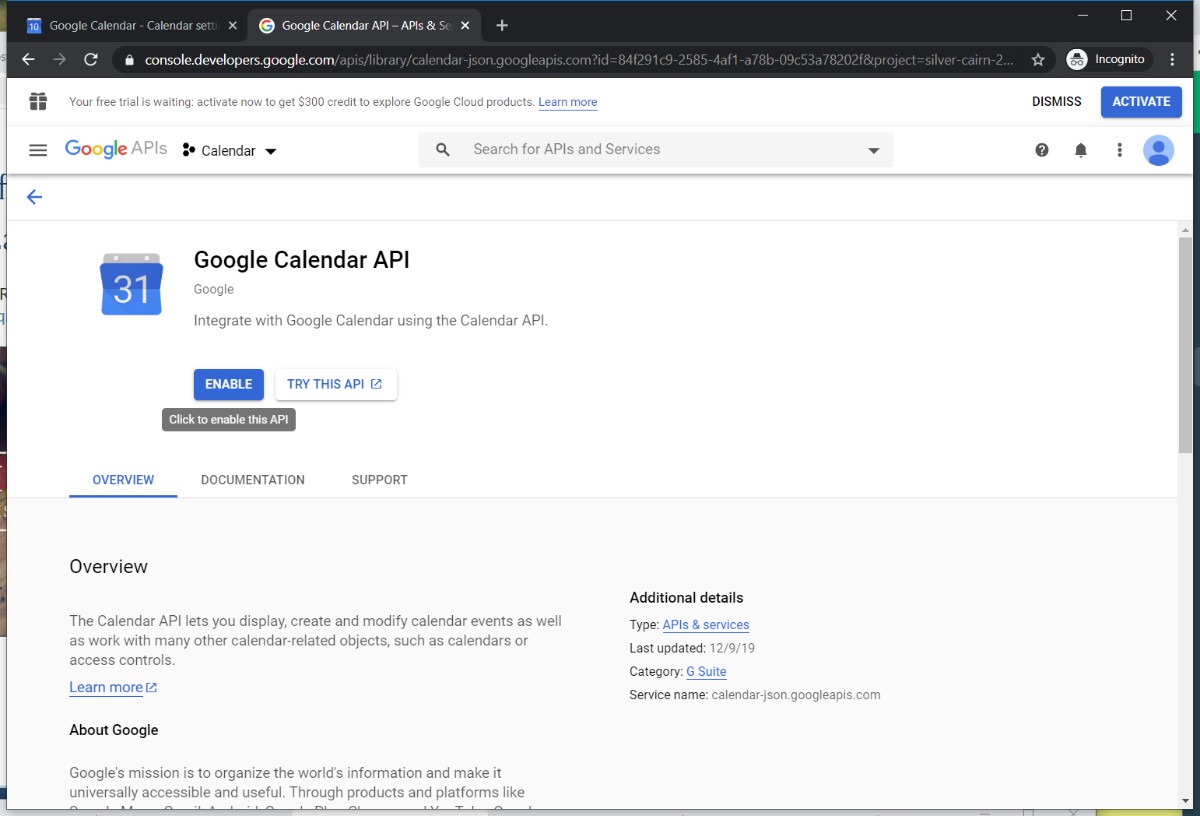
3. Enable Google Calendar API in the Library
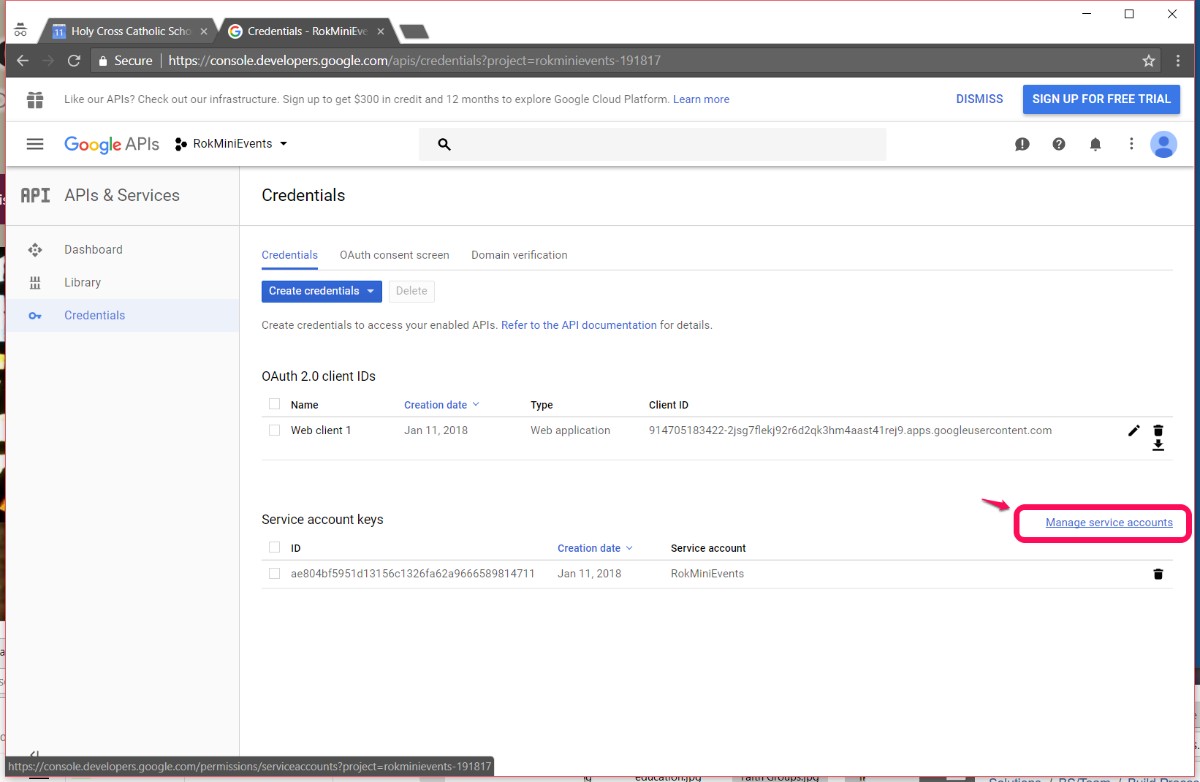
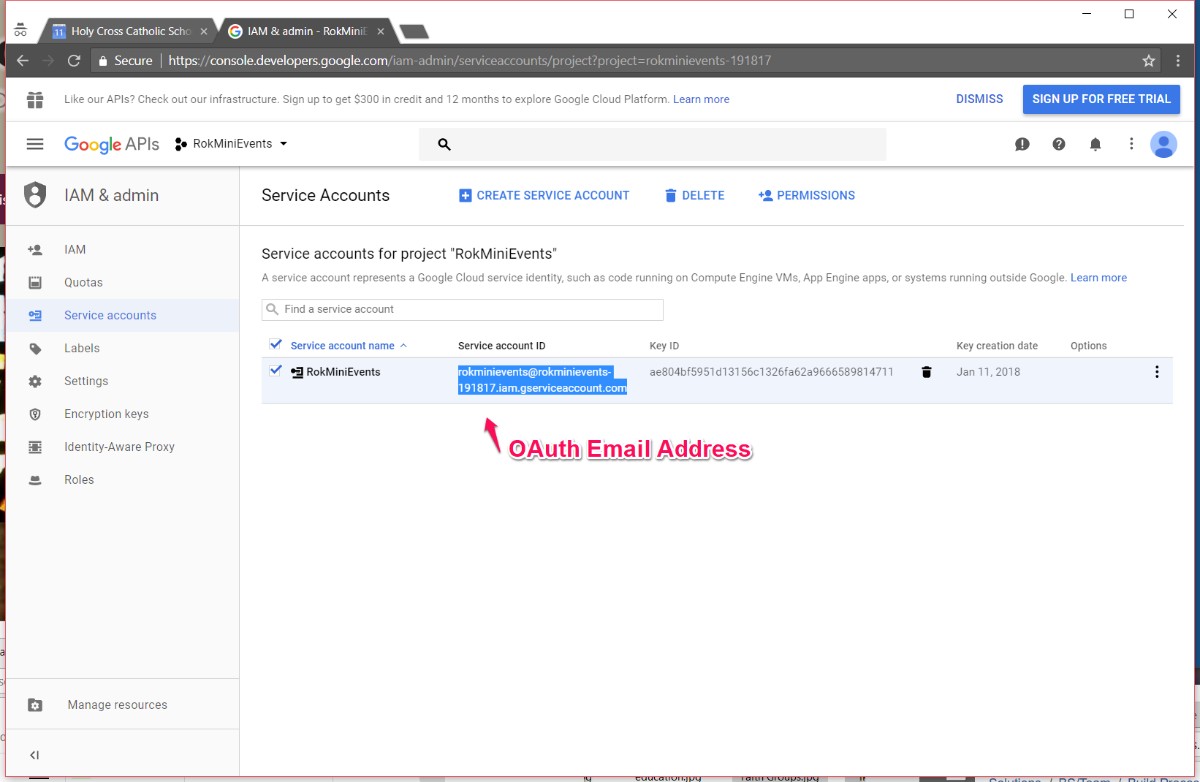
4. Credentials: configure consent screen, create OAuth Client ID and then Service Account. Click through service account email address to get to keys screen to generate json file for uploading to the Admin Tools Calendars Screen
5. Alias - you create, suggested
sitecode-calendar
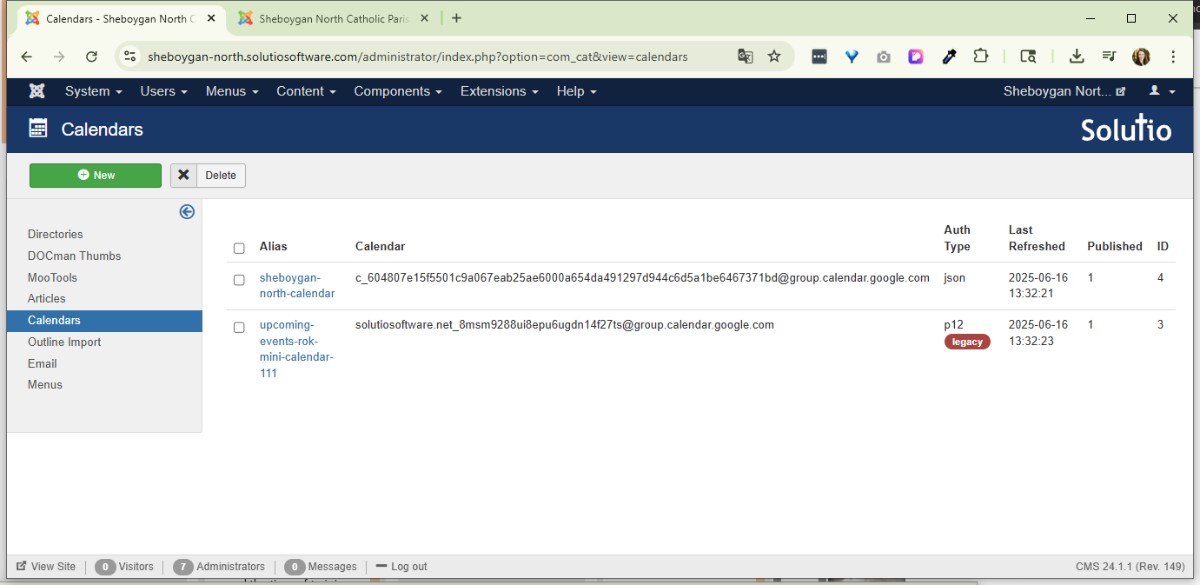
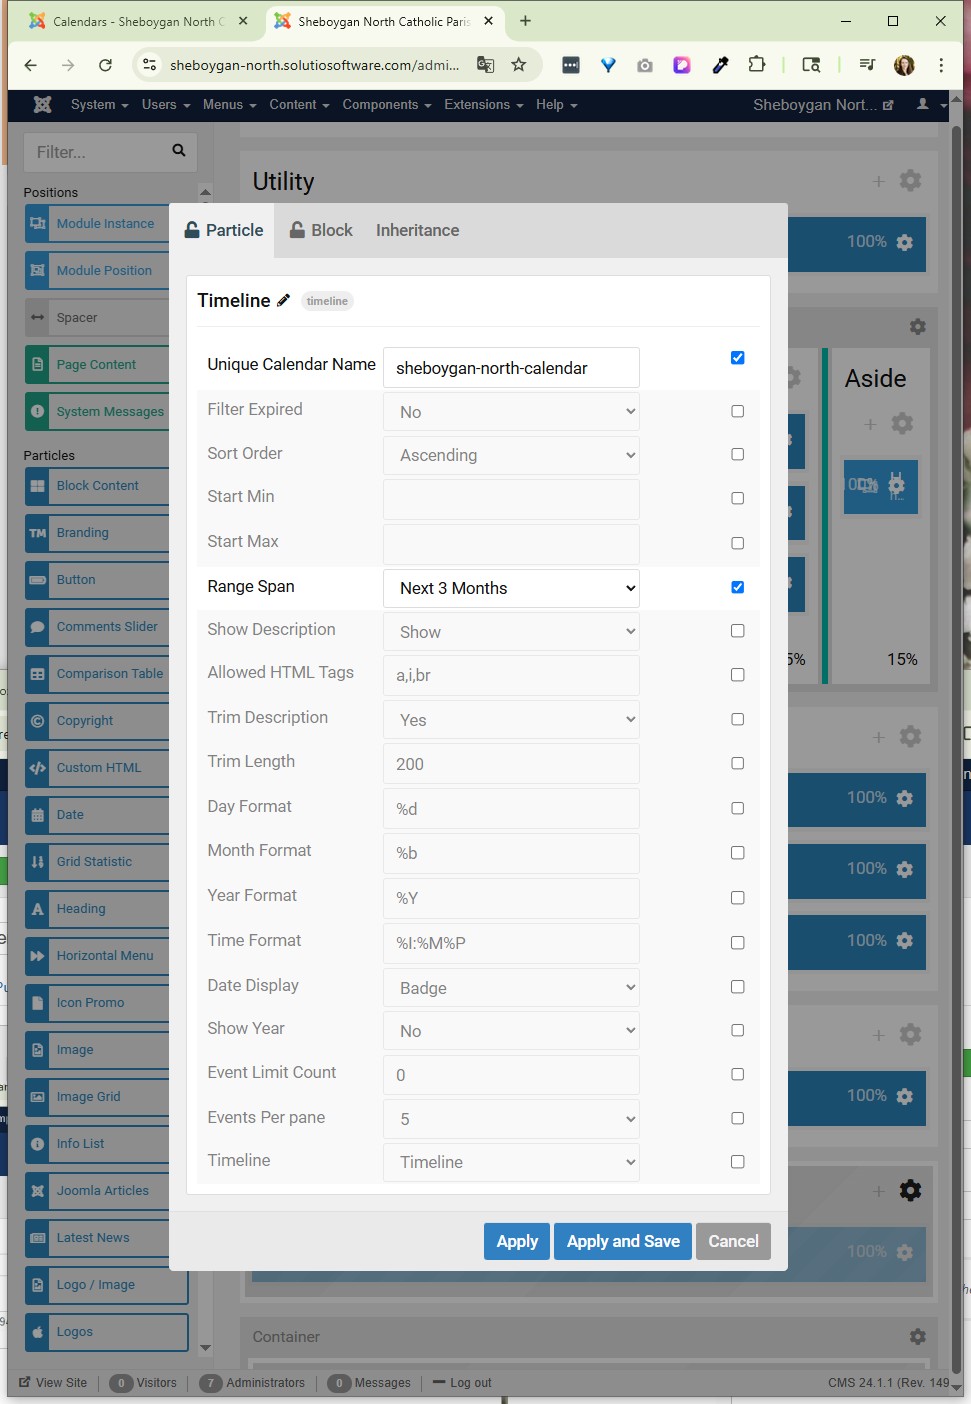
Update Alias in the Unique Calendar Name field in gantry 5 particle (either in outline or as a module)
On the previous Admin Tools screen, refresh to get calendar to load.
================================================================================
Updated 3/17/17 by JKK
NOTES FROM ANDY:
http://www.rockettheme.com/docs/joomla/extensions/rokminievents/google.md
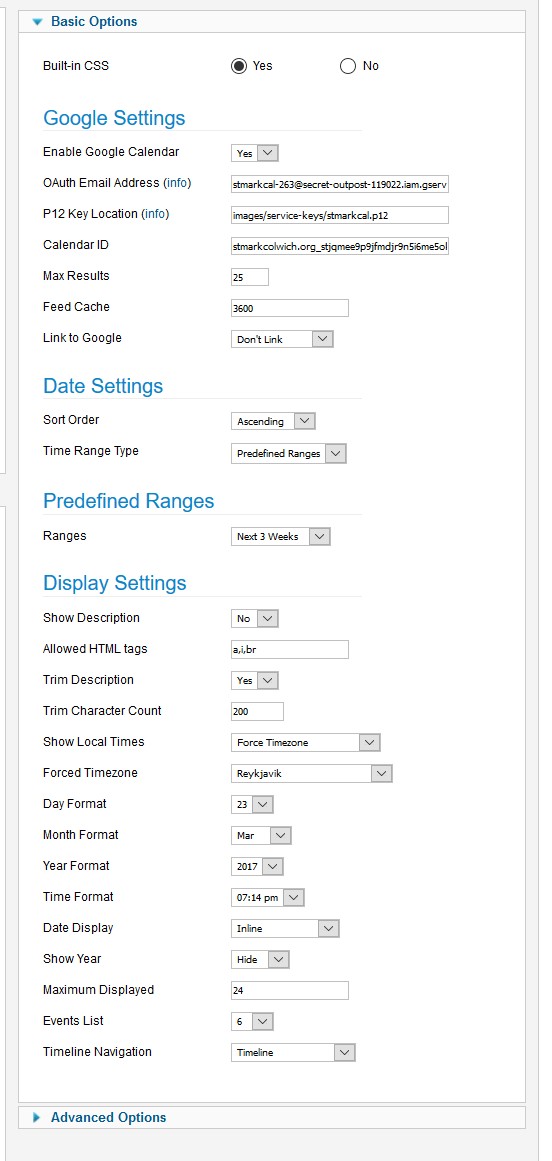
When you go to upload the .p12 file you download from the Google Developer Console (which you'll want to visit from the signed in calendar account), upload it to images/service-keys/filename.gcal. For example, I did a test with one of my Solutio calendars and the path I entered into the module for the "P12 Key Location" was:
images/service-keys/gcal.p12
This new service-keys directory is protected from public web access so it's safe to store the key there. The new version of this module also has a responsive output.
INSTRUCTIONS:
-Visit in the signed in calendar account
https://console.developers.google.com/
https://console.developers.google.com/projectselector2/apis/dashboard?pli=1&supportedpurview=project
-Enable and manage APIs
-Set Up OAuth first then service account
-To create an OAuth 2.0 client ID in the Google Developers Console:
-
Go to the Google Developers Console.
-
Click 'Library' - search Google Calendar API - Click Enable.
-
On the left, click Credentials.
-
Create a project - any name will suffice
-
Click Create Credentials, then select OAuth client ID.
-
Configure Consent Screen. --only field needed is Product Name Shown to Users ( If this is your first time creating a client ID, besides being able to select your application type, you can configure your consent screen by clicking Consent Screen)
-
Select the appropriate application type(Web application) for your project and enter any additional information required. Click Create.-- OAuth Client details will display. Neither are needed to input into RokMini Events module. Click OK.
-
Proceed to make Service Account Key as instructed below.
-
Click Create client ID
To delete a client ID, go to the Credentials page, check the box next to the ID, and then click Delete.
Service Account Key instructions:
-
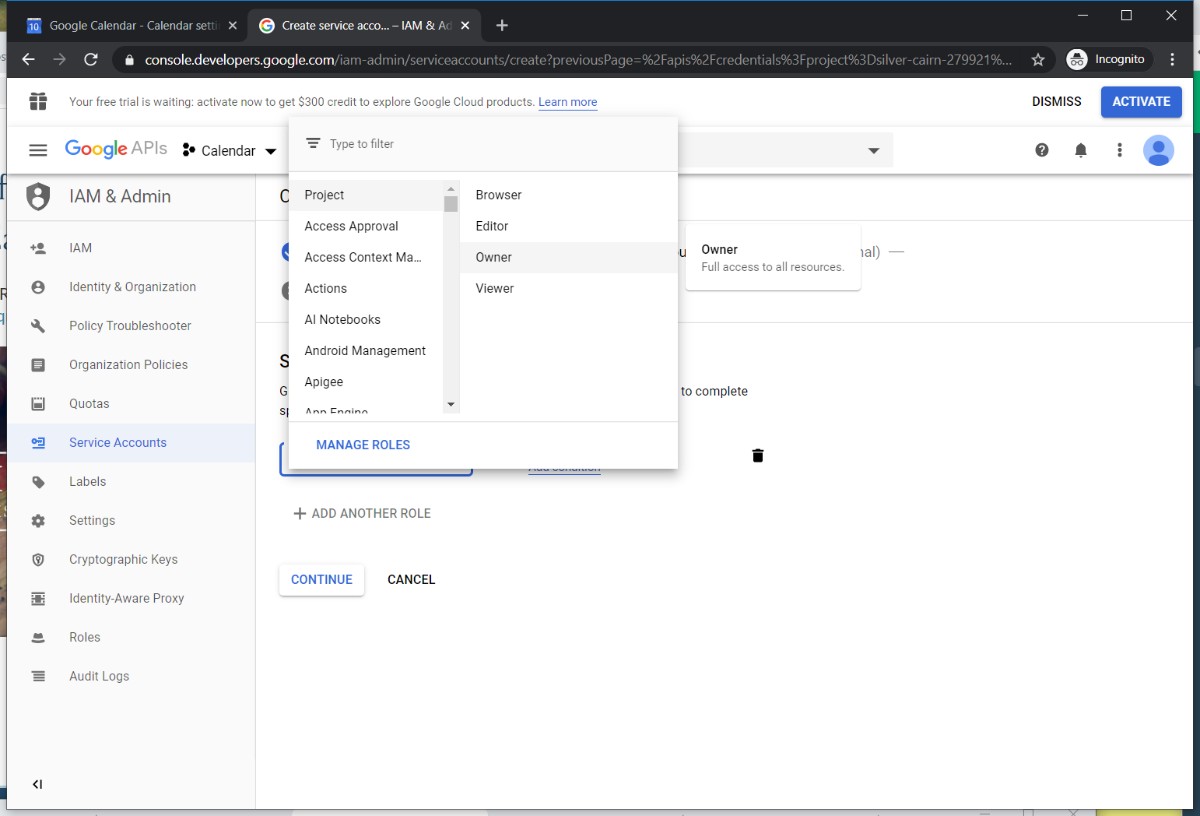
To set up a new service account, click Create credentials and then select Service account key.
-
Choose the service account to use for the key. New Service Account.
-
Give name, choose role (owner). [Service-account ID is what is needed for the OAuth Email field in module] Choose to download the service account's public/private key as a standard P12 file. Click Create.
-
Your new public/private key pair is generated and downloaded to your machine; it serves as the only copy of this key. You are responsible for storing it securely.
-
Find file in computer downloads. Double click to open, proceed through prompts and type password notasecret.
-
After this, rename file to reflect client. Upload to service-keys folder via FileZilla, Cyberduck or related FTP.
-
FIND the
Input details into RokMiniEvents3 module
-
OAuth Email Address
-
P12locoation
-
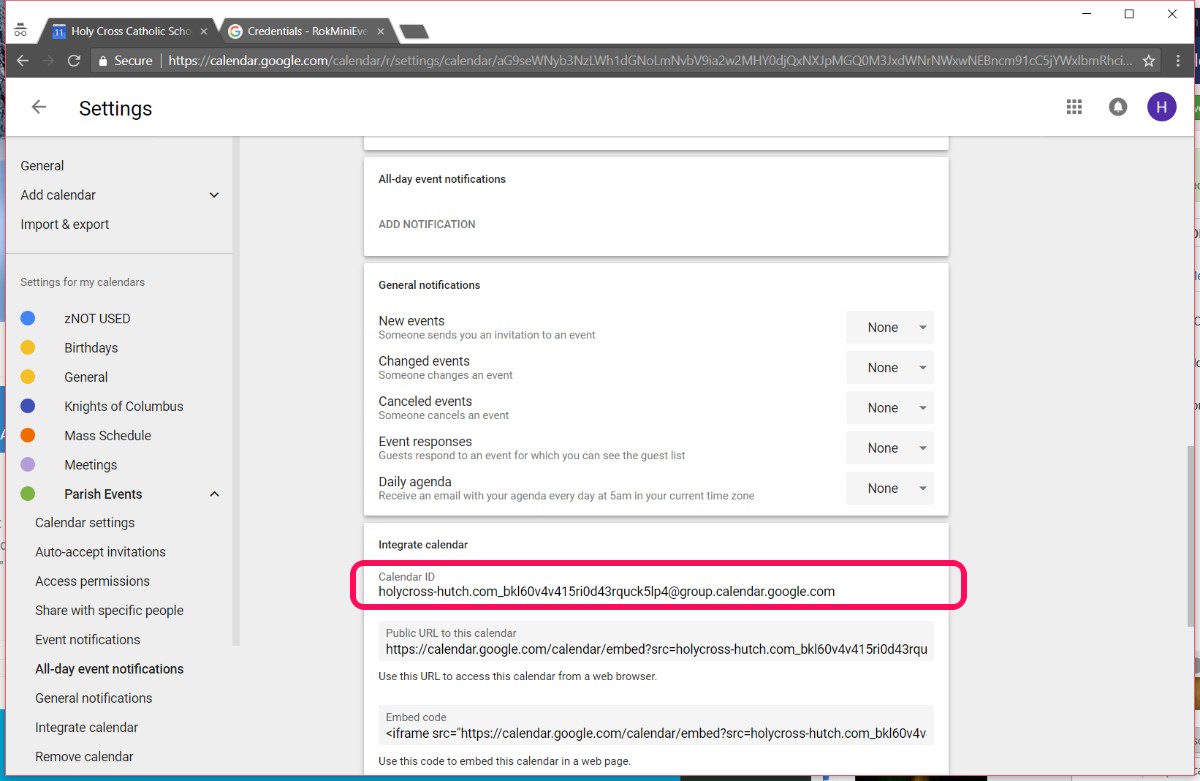
Calendar ID (rokminievents can only pull one calendar) make sure calendar is public
Rocketthemes’s documentation: http://www.rockettheme.com/docs/joomla/extensions/rokminievents/google.md
(not updated with google)
TIME ZONES:
Eastern USA = Porto Novo (depends on spring forward or fall back)
Central time = Reykjavik or Dakar
Mountain time - Cape Verde
Western - Sao Paulo (Brazil) - no daylight savings in 2022 or South Georgia (works for DST in 2022)
Honolulu - La Paz
https://www.timeanddate.com/worldclock/difference.html?p1=204
.p12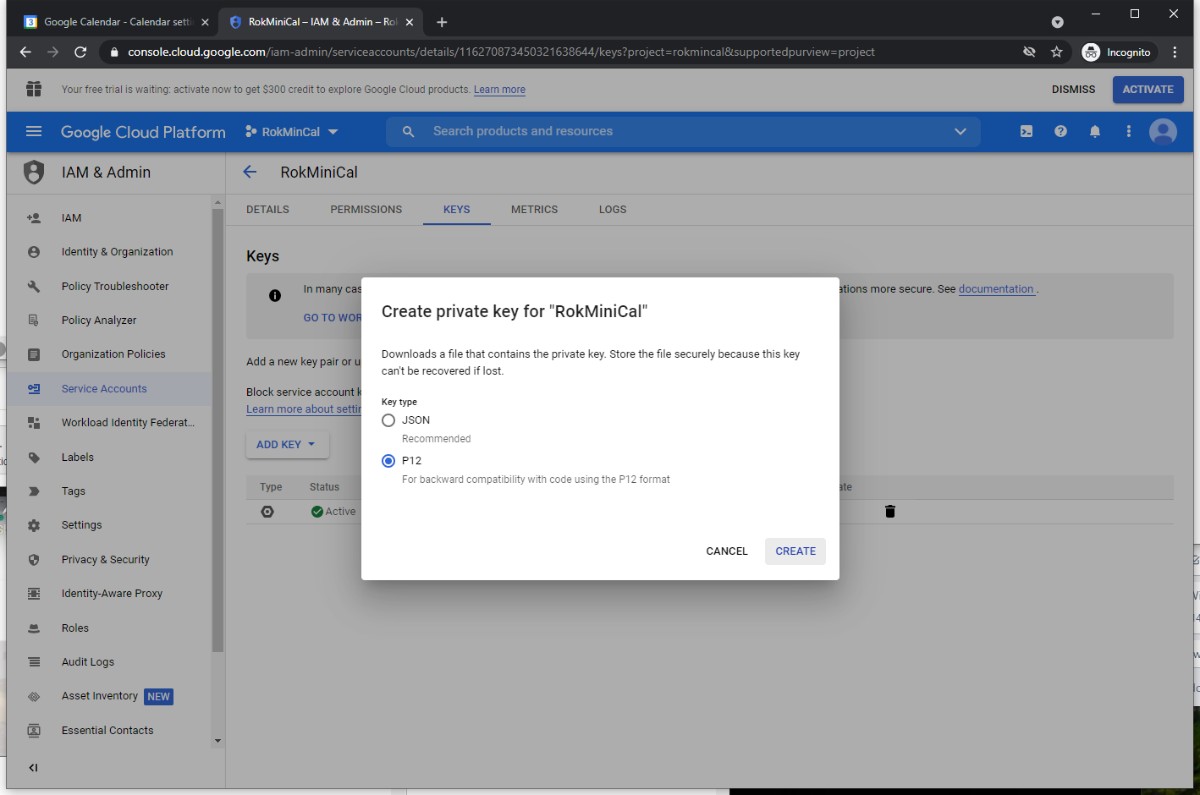
Double click the downloaded p12 file to run it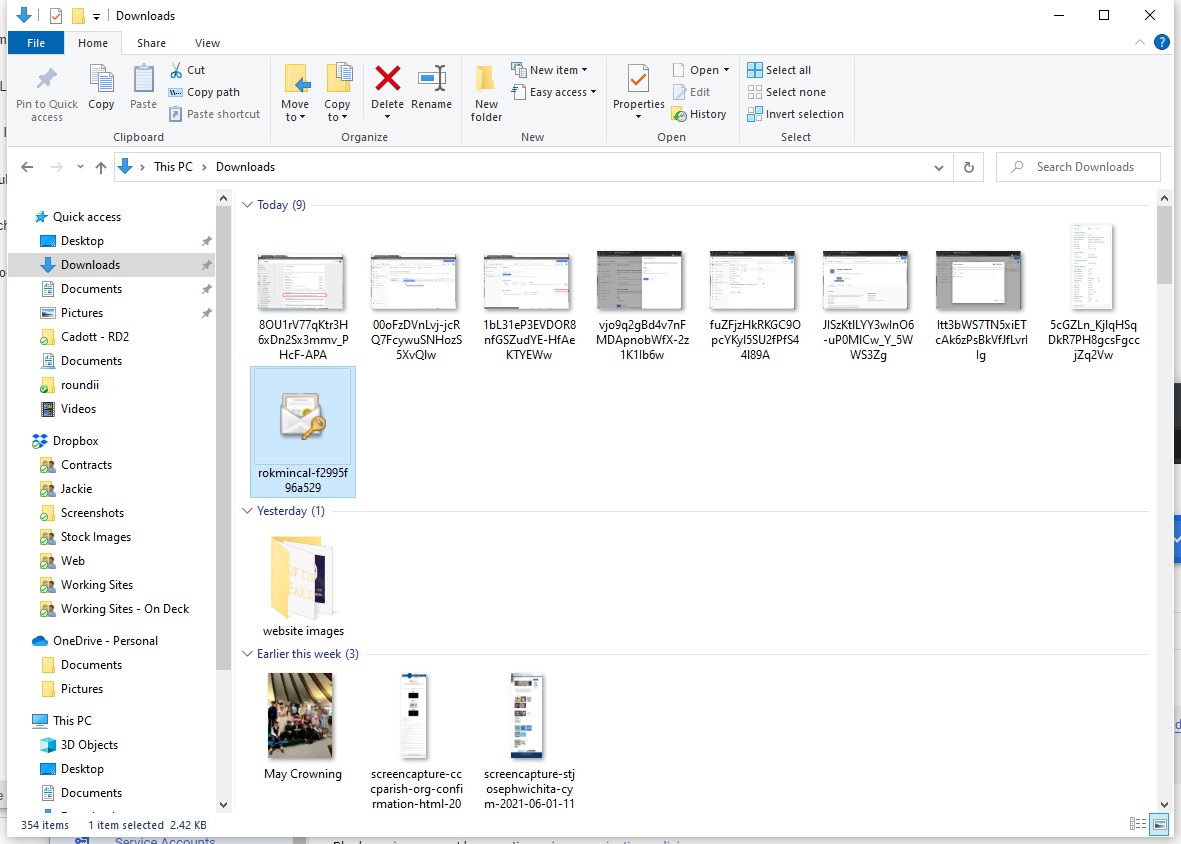
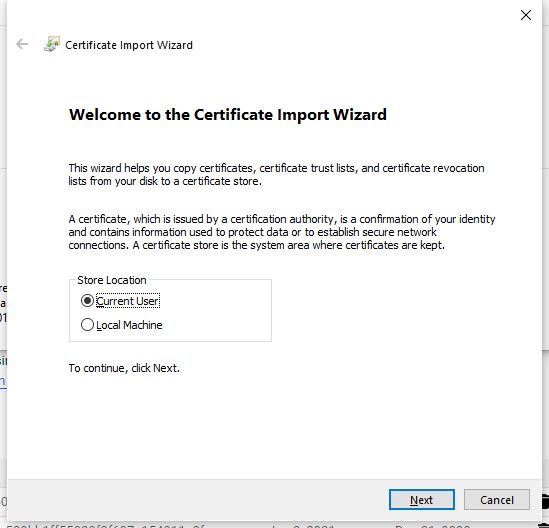
Click through all the steps. The secret has always been notasecret