Video Embedding
- Details
- Tori Schippers
Calendars
- Details
- Tori Schippers

Calendar Feed
This is where you will create the new calendar looks. Add the information and the builder will adjust as needed.
You will need to get login and password from Al. https://calendarfeed.solutiocloud.us/login
Color Label HTML
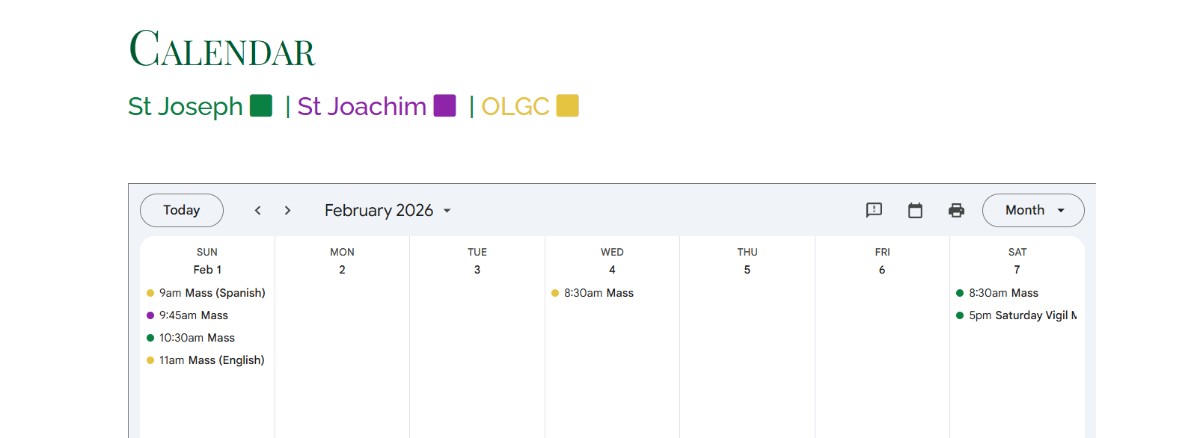
Update the info in red.
<p span style=#0b8043;">St Joseph <i class="fa fa-square"> </i> | <span style="color: #8e24aa;">St Joachim <i class="fa fa-square"> </i></span> | <span style="color: #e4c441;">OLGC <i class="fa fa-square"> </i></span></p>
Saints Public Calendar URL
New Website Content
- Details
- Tori Schippers

A couple of things to be cognizant of when transferring content from Trello and/or a client's old website to our new website. Remember to constantly check your work, this will save you a lot of time in the end.
Constancy
Little things like constancy make the website look cleaner and shows a higher level of professionalism for the client as well as Solutio.
Lack of constancy is generally seen when:
- Copied information does not have the formatting removed.
- We use different headings/ menu settings on the various pages. (I prefer using Heading 6 in most websites if I'm trying to differentiate between sections).
- Classes are not removed on all modules.
- Phone number and email formatting. (Don't have a number formatted like this (316) 227-1750 on one page and then 316.227.1750 on a different page.
- Phone numbers and emails are not all linked.
- Grids .
- External links target are not set to new window.
- We manually adjust tables instead of using classes.
- Ministry or staff images have not been resized.
Above are just a couple of examples; remember it's better to slow down and be thorough than just checking things off our list.
Coping and Pasting information to an article
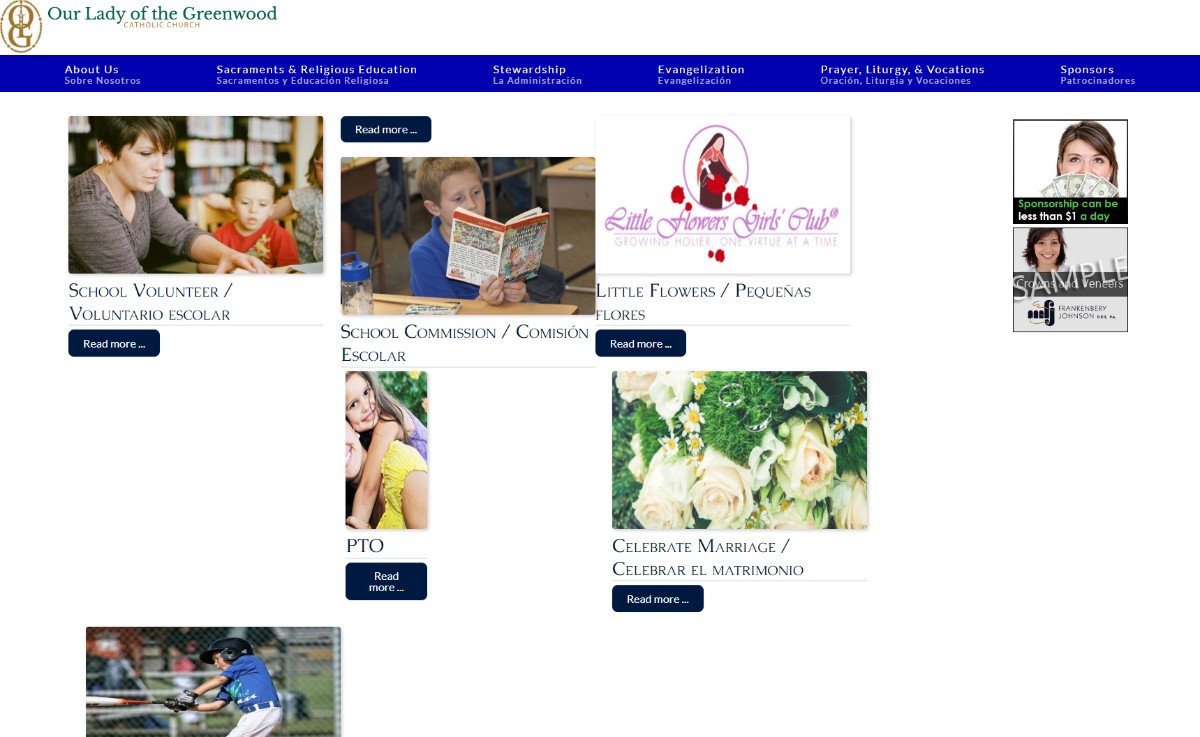
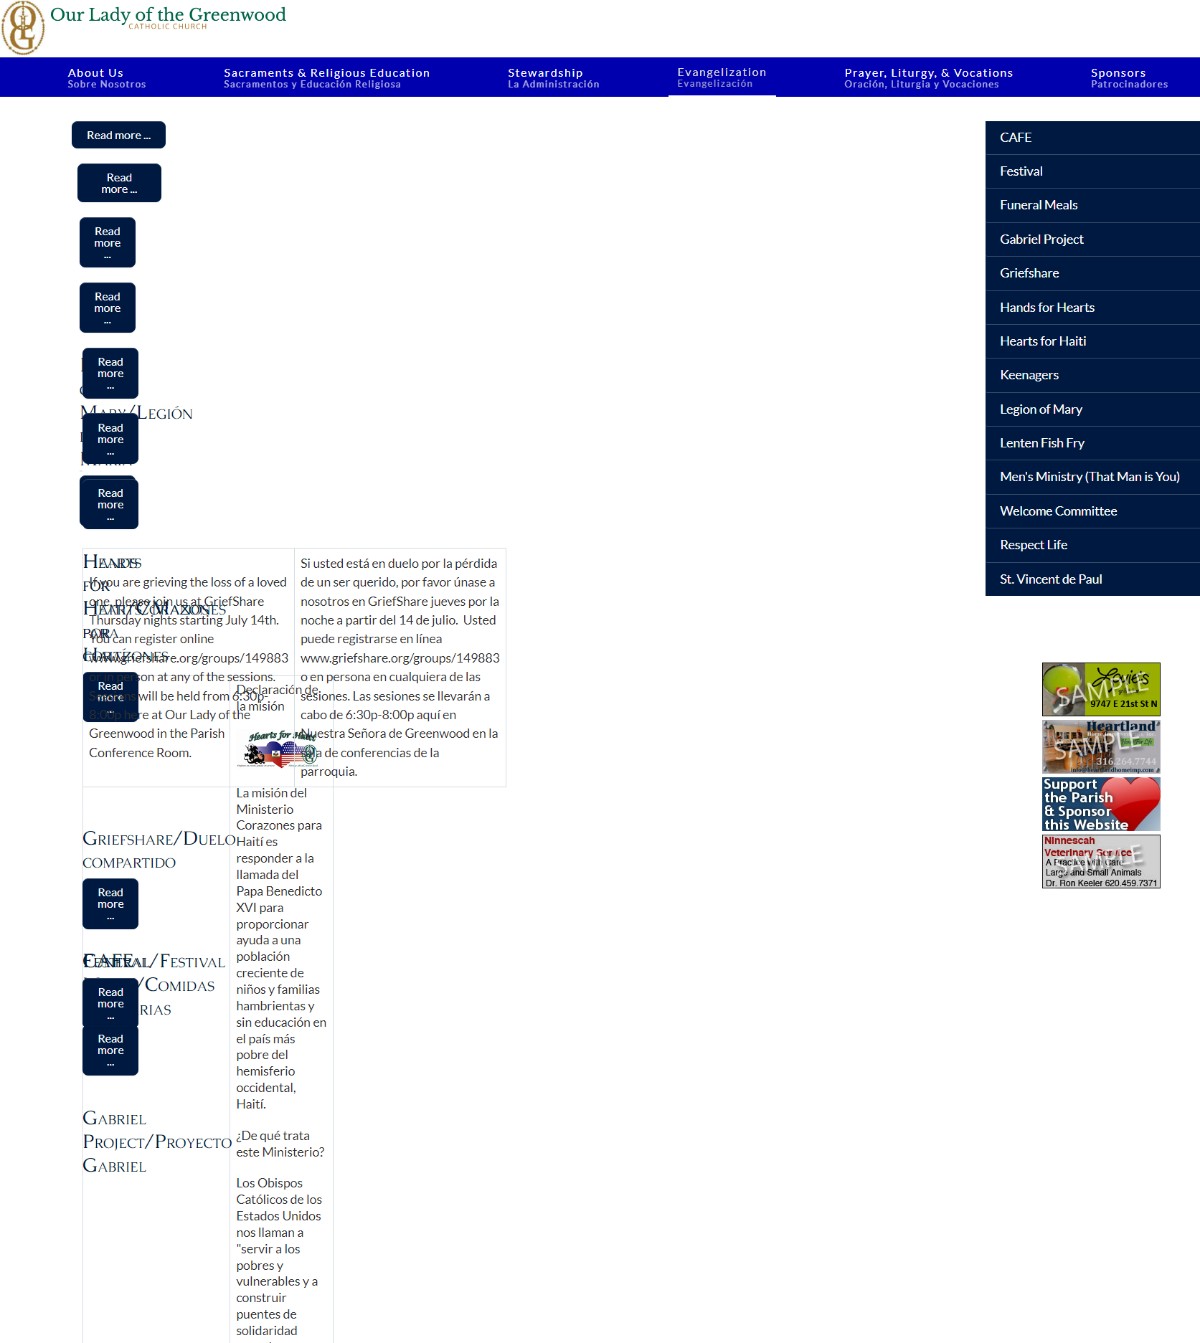
When pulling over content from a client's old site/Trello, you MUST remove formatting! If the website you are pulling from is more than just a colored background, you may need to check to make sure extra code wasn't added, e.g. <div>, <span>, <section>, <figure>, <wp>, or extra <class> tags aren't added. Having these extra tags can make the format of the page really wonky (especially on a ministry layout). See images below for visual reference.
| If you see these issues on a page it normally means tags weren't removed |
|
 |
 |
When pulling information over, highlight the text (hold "ctrl" and press "a" to select all text,) click the "clear formatting" button in the article toolbar. Every couple articles double check in toggle editor to make sure that the formatting is removed. Just because you "clear format" using the button, doesn't meant that all formatting has been removed.
Also when you are pulling information from a client's old site, please do not copy and paste any pictures and/or clipart from the website (unless the client expresses a desire for that picture/clipart). Same goes with information over 5 years (again, unless the client expresses that they want it on the new website).
Adding pictures to Articles
When adding pictures, make sure to upload the pictures to either the parish folder, template folder, or create a new folder in image manager. Try to keep it clean and organized so it's easy for the client to update the pictures if they want (this especially goes for ministry pages). We don't want to clutter up/have a disorganized image manager before the client even logs into the back end.
Pictures also need to be tastefully sprinkled throughout the site either in the articles themselves or as hero images.
Image Manager
If you create a new folder in image manager, avoid the following:
- Capital letters
- Special characters
- Spaces (use dashes instead)
- Limit the name to 40 characters
Sometime having one of the above will not allow the client to access the picture via the "image" button in the article toolbar. It can also disrupt the file path. When this happens, create a new folder under the same name, but without the above criteria.
Hero Images
Hero images are only used if the header is simple, or if the client requests them. Couple of things:
- All hero images are the same size: 1600x444px.
- Save the images to the hero's folder.
- Try use the client's pictures before stock (stock images can be found here. I am constantly adding/updating our selection).
- Try to not duplicate hero images on various pages. (Sometimes it is okay to use one hero image per main menu, especially with smaller websites/parishes).
- Make sure people's heads in the hero images are not chopped off in a weird way or that the image is too pixelated.
- Try not to use rotator images if possible.
- They can be various widths and have different opacity. (These changes are made in Cyberduck).
Hyperlinks
Internal Links: URLs that point to a different page on the same website (e.g. stmatthews.org/news ---> stmatthews.org/school)
External Links: URL that point to a page on a different website/domain (e.g. stmatthews.org ---> usccb.org )
Any of the following need to have the target open up in a "New Window":
- Documents .pdf, dox. doc. etc..
- External links
- Forms
- email address
Tables
If possible, use the "Insert Template" button on the article toolbar to add the desired table. Check the styles page to view the various tables. If you have to create the table from scratch, try not to manually adjust the cells width and height, try to use a class. Manually adjusting the table may look nice on desktop, but rarely will it look the same on mobile. Couple of refreshes on table html.
classes are added to the tables tag.
<table class="fancytable"
<tr> </tr> stands for Table Row (row)
<td></td> stands for Table Data (cell)
<th></th> stands for Table Header (colored cell)
When creating a table, be sure to check your work in mobile view before marking off as complete.
Podcasting
- Details
- Tori Schippers

- Email Andy to add Podcasting to website (if the parish wants it)
- Check the Feature Notes section in SBS to see if the client will be doing podcasting. if blank, assume no. -- Andy will create a category that links to the Podcast Manager
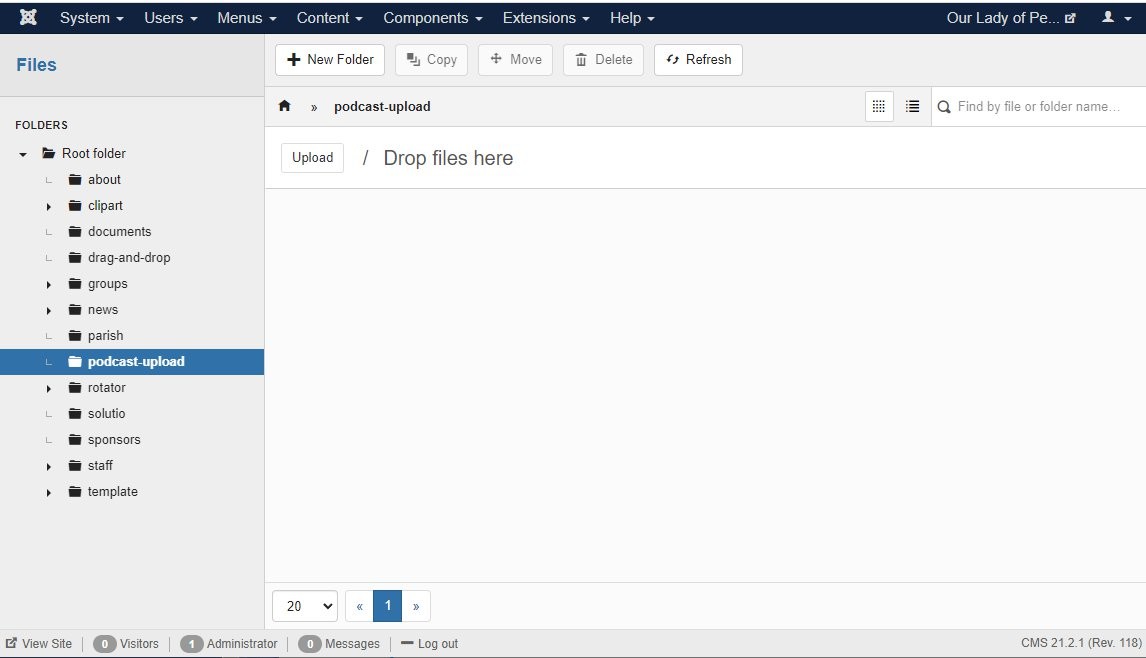
- Create folder in image manager, "podcast-upload" in the root folder
- Publish podcast upload and podcast manager icons in the icon panel manager

- Add this to the category description:
<table style="width: 100%;" border="0">
<tbody>
<tr>
<td>
<p>Podcasts are an easy way to listen to audio from Our Lady of Perpetual Help Catholic Church. <br />Click on a link below to listen to the various podcasts.<br /><br />RSS Feed<br /><a href="/podcasts/homilies.xml" target="_blank" rel="noopener noreferrer">http://SITEDOMAIN.ORG/podcasts/homilies.xml</a></p>
</td>
<td align="center">
<p><a class="readon" href="https://SITECODE.solutiosoftware.com/">Subscribe with iTunes</a></p>
<p>Coming soon</p>
</td>
</tr>
</tbody>
</table> - Create podcast or homily menu item: Category Blog --> two columns, set category description to show and hide article titles.
- Check to see that the podcast feature functions by uploading a mp3 to the site. HailMary-MP3.mp3
- User Information for all sites
- user: manager
-password: portal3pod
Teacher Pages & Side Menu Subcategory
- Details
- Jackie Riddel
Each teacher must have two categories:
Create Categories
- Grade & Teacher Name category (e.g. 3A -Smith)
- Side Menu Category (e.g. 3A Side Menu Items)- The side menu category will contain additional pages such as assignments, newsletters, etc. (click image to enlarge)
Create Teacher Profile Article
(This article contains the teachers contact info, i.e. photo, name, title, email, phone, bio etc.)
- The articles will be added under the "Grade & Teacher category"
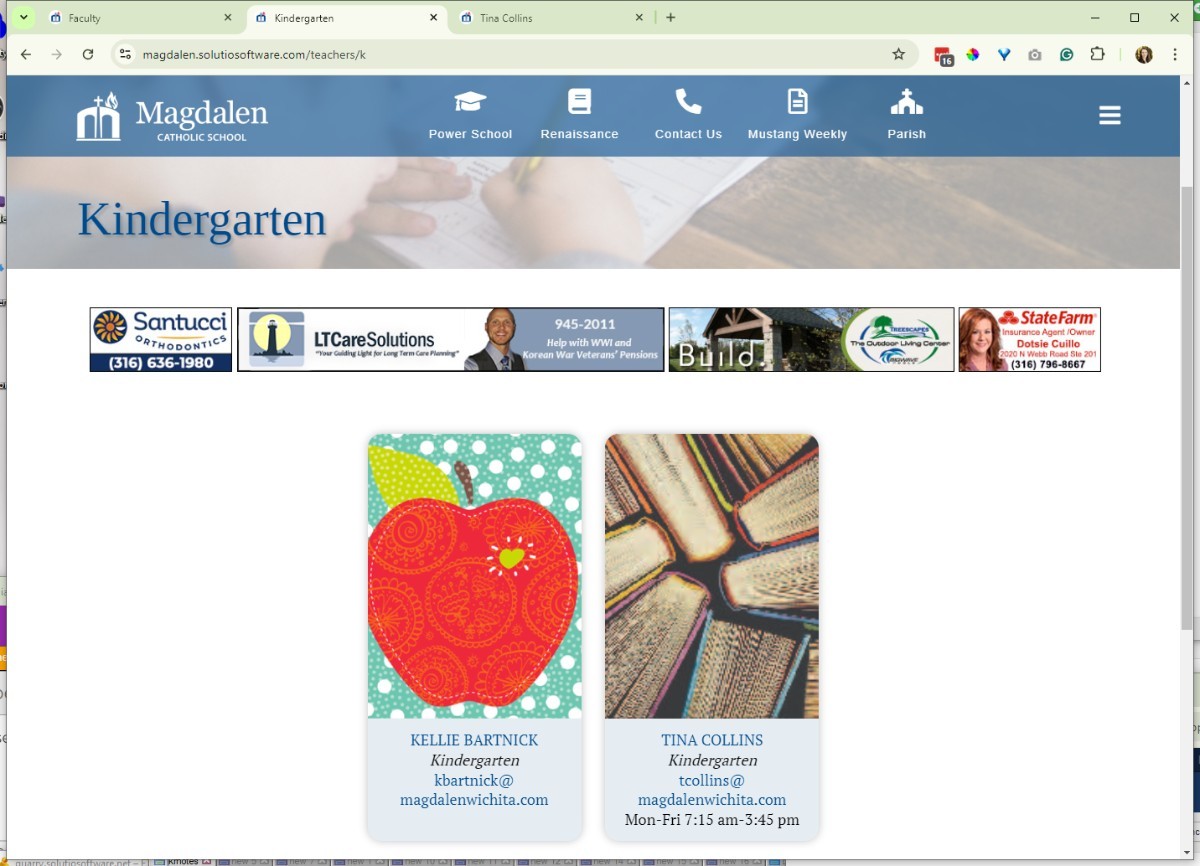
- This article will be set to featured and will appear in the sidebar contact section.
Create Grade Page Articles
- Tile should be the name of the grade/class
- Set to featured
- Saved under the Side menu category

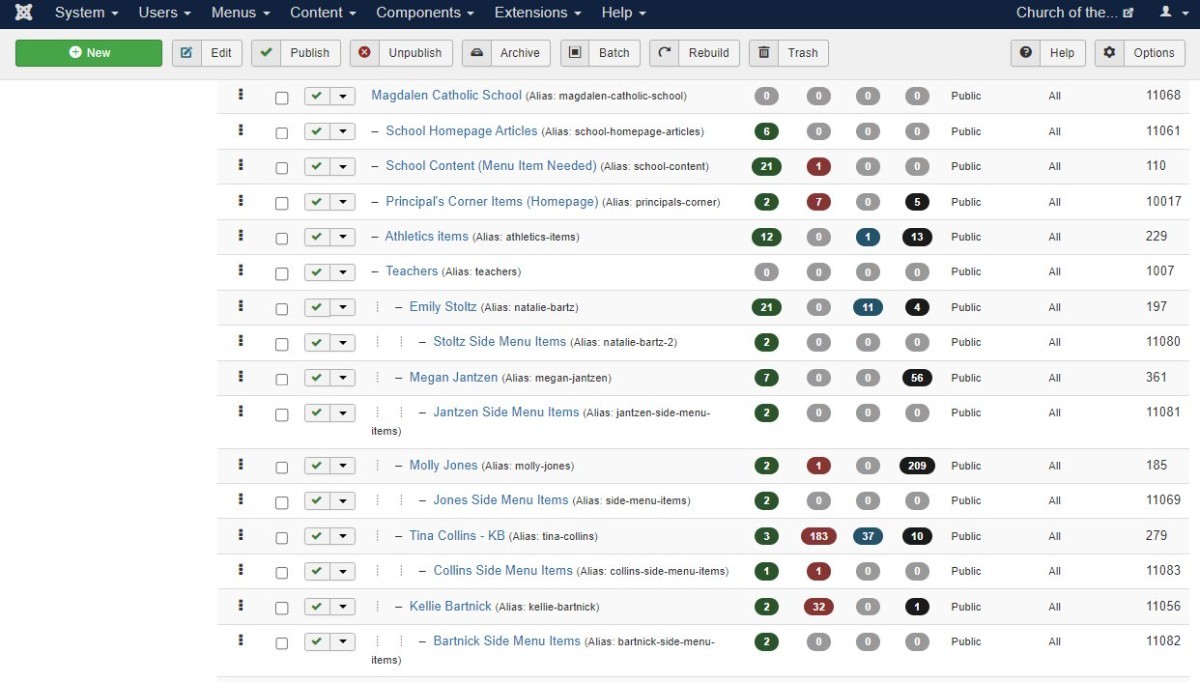
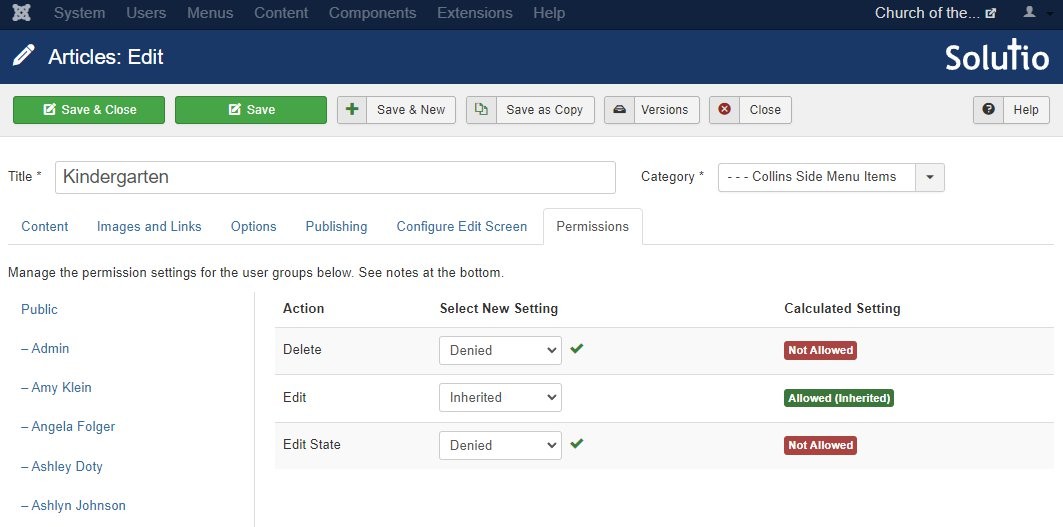
- Set permissions so that the teacher does not delete or unpublish both/either of these article:
Create Menu Items
(Match the existing teacher menu structure on the site for each teacher)
- Create a single article menu item pulling from the Grade page article we just created.
- Set page class to school-staff-layout
- Create a blog or category list submenu item (otherwise side menu articles will not have a menu item to anchor from. But set it to hide in gantry settings)
Modules
(Each teach pages needs multiple grids)
- Page grid -Blog layout used for the main page content
- Featured article (Sidebar) Displays the teacher profile/contact info.
- Side Menus (Sidebar) - Shows the subcategory list of teacher pages.
- Documents - Only required if the site is older and already uses document modules.

- There will also be a staff grid module on the class page (especially on bigger schools) if not one for all staff
User Group
Create a user group for the teacher.
- User Group - name by grade and teacher last name - so it is easy to update when teachers change - give permission access to their parent category (the child category will inherit the permissions) Naming format (e.g. 3A-Smith)
- User account with access to basic editor and their respective user group
Final Check before Completion
- Categories are created correctly
- Profile article is featured
- Grade page article is featured
- Menu item uses school-staff-layout
- Hidden category menu exists
- Modules are assigned
- User group and user account are set correctly

Grid Layout Setup Instructions
- Details
- Joel Padgett
The Grid Layout is made up of two main parts: Page Content and a Joomla Articles Particle. The Joomla Articles Particle pulls articles from a selected category and displays them in a styled grid layout.
The Page Content should point to a Single Article that has the same title as the page. This article does not need any content unless a Leading Article has been requested. Its primary purpose is to display the page title and allow space for optional introductory information.
The Joomla Articles Particle Module should be set to pull from the category created for the Grid Layout. This module must be placed in the position CONTENT-BOTTOM-A, which ensures the grid appears below the page content.
If the grid needs to link to specific menu items instead of articles within a category, use the particle type Block Content instead of Joomla Articles.
Every category used in a grid must also have a display menu item created in either the secondary-menu or the hidden-menu. This menu item provides a landing page for the articles in that category, allowing them to display correctly when selected from the grid.
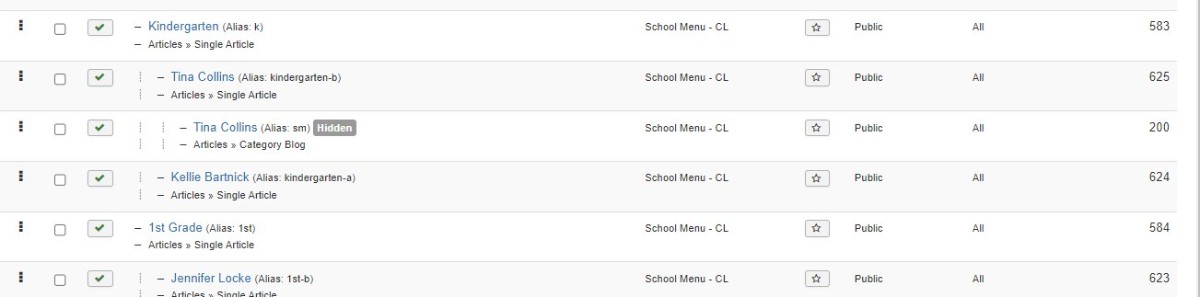
Grid Layout Setup
- To begin creating the new Grid Layouts you will need to check to see if the Grid Outline has been created. It should look like this:
Once you are sure the Grid Outline is correct you can begin building the Grid Pages.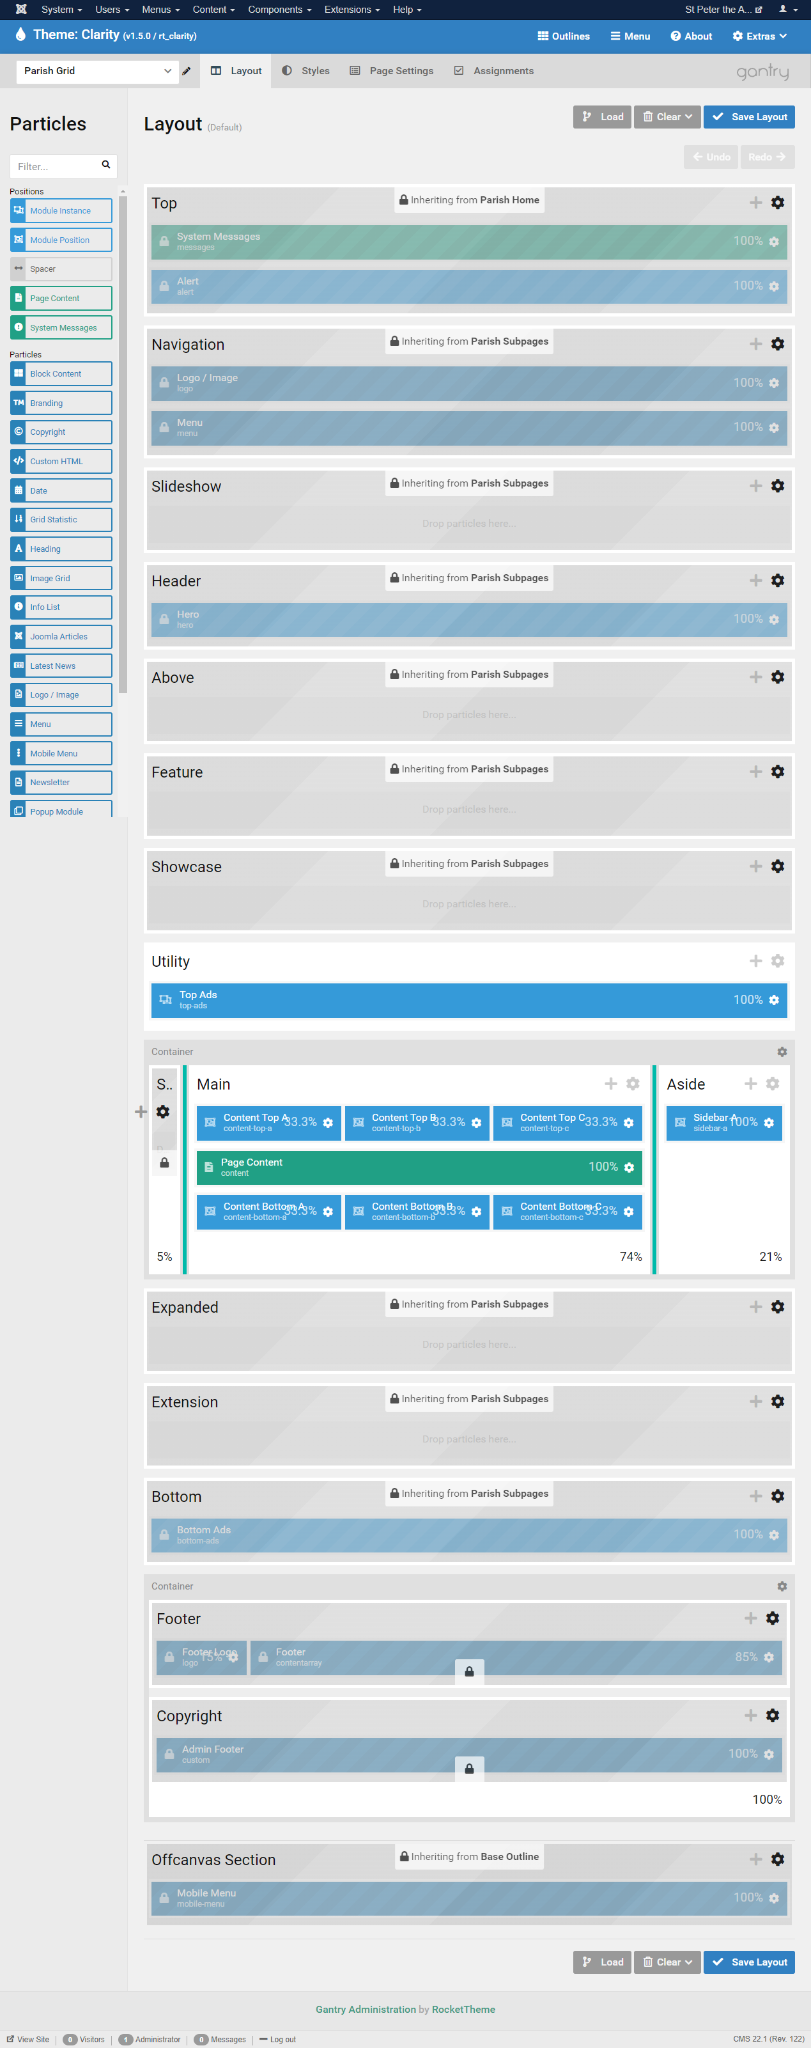
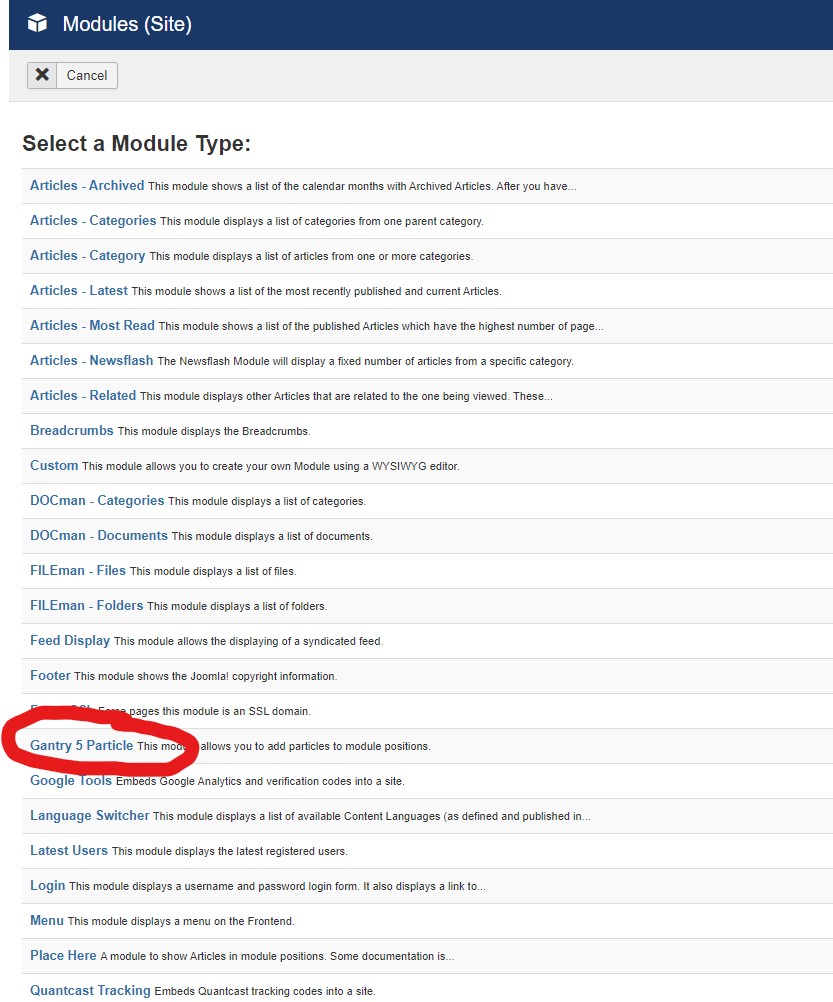
- Go to the Module Manager and create a "Gantry 5 Particle"
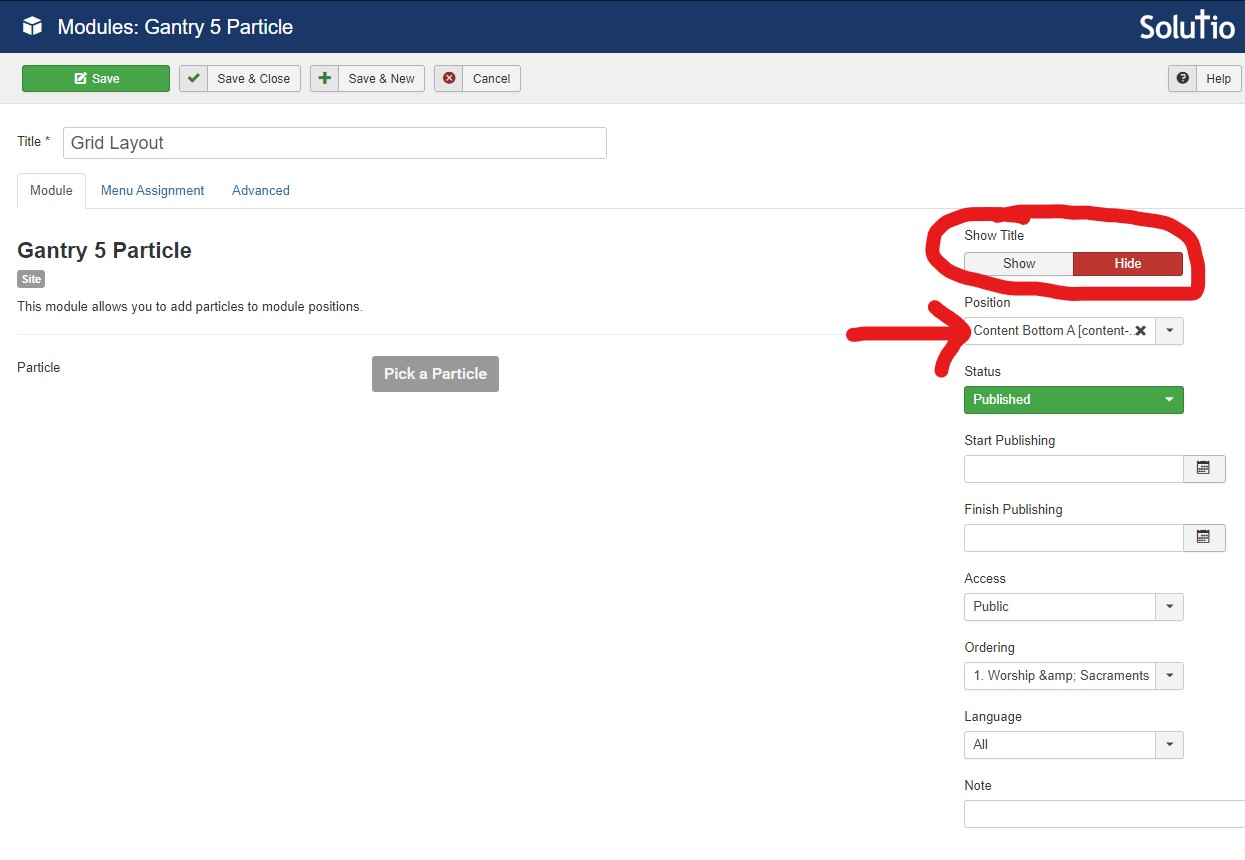
- Under the "Module" settings tab give the Module a Title that describes the category being shown and set the "Show Title" setting to "HIDE" and the "Position" setting to "CONTENT-BOTTOM-A".
- Under the "Menu Assignment" settings tab in the dropdown select "Only on the pages selected" setting and select "none" near the top. Then go find the "Menu Item" that you are wanting this grid to be on and select it.
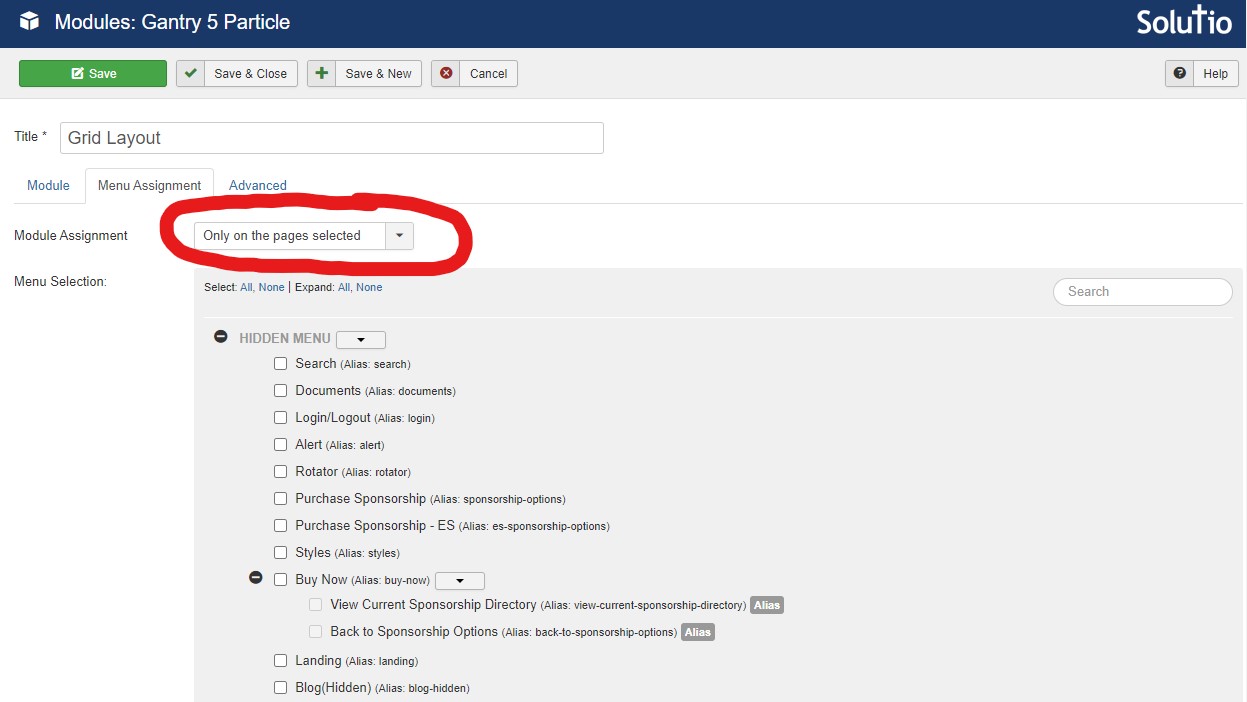
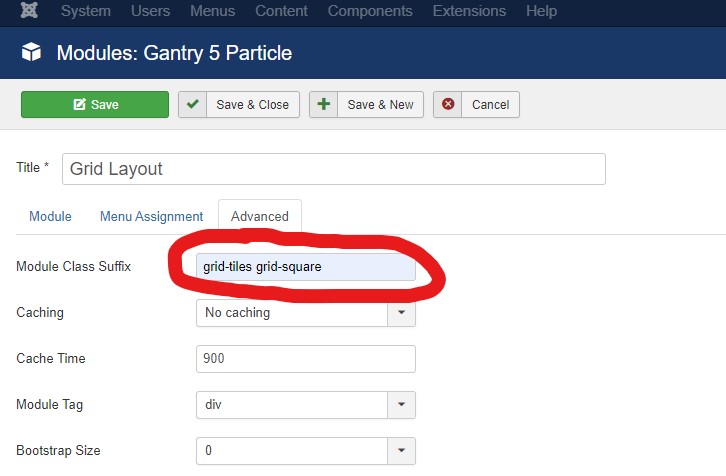
- Under the "Advanced" settings tab place the classes that correspond to the "Grid Layout" style that you have selected from the STYLES site in the "Module Class Suffix" box. (In this example the classes being used are "grid-tiles" and "grid-square" and "grid-tiles-mobile"
- Back under the "Module" settings tab click into the "Edit Particle" / "Pick a Particle" button.
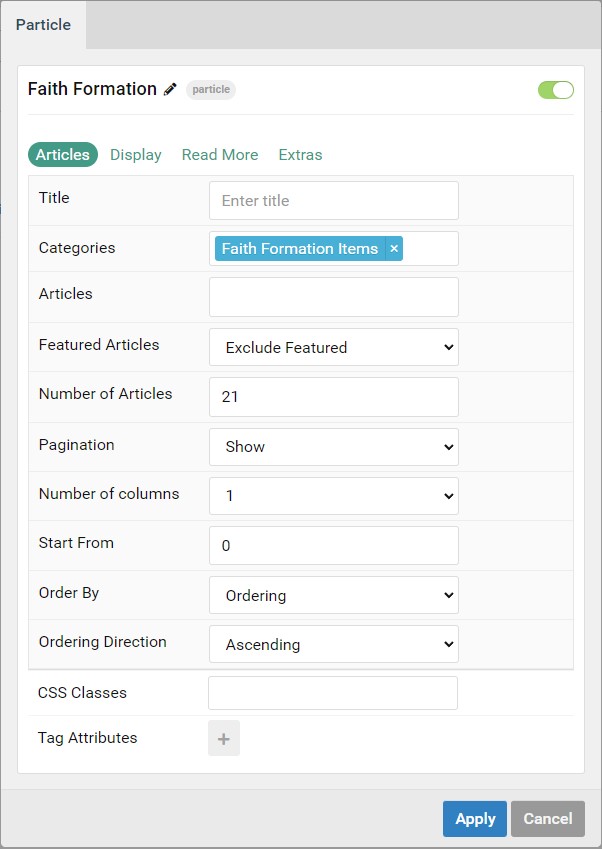
- For a Category full of Articles "Grid Layout" select the "Joomla Articles" Particle.
- For a Grid of Links that lead to other "Menu Items" select the "Block Content" Particle.
- Within the "Particle Settings" under the "Articles" tab place the Category that holds the Articles that you are wanting in the "Grid Layout" in this example the Category is "Faith Formation Items". The other settings should be as follows. The Number of Articles can be changed to what is needed per site.
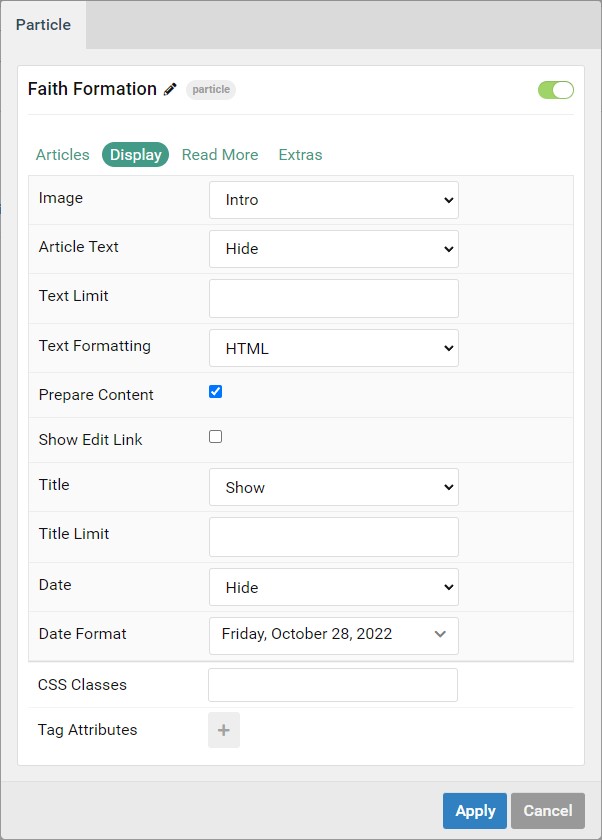
- Within the "Particle Settings" under the "Display" tab follow the settings here:
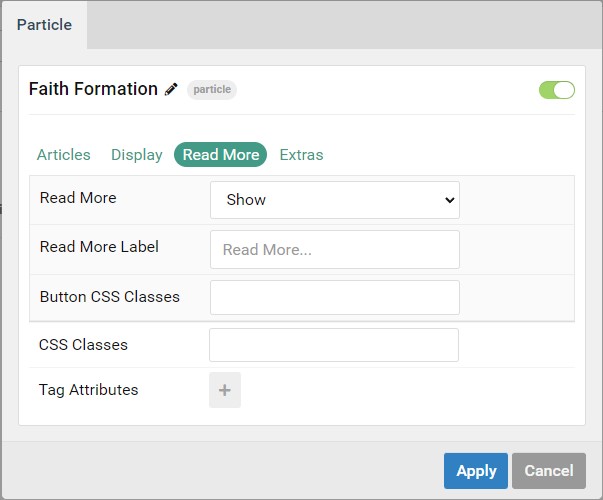
- Within the "Particle Settings" under the "Read More" tab follow the settings here:
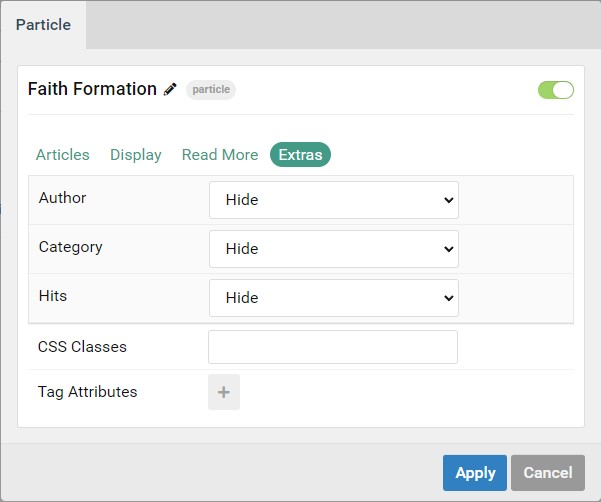
- Within the "Particle Settings" under the "Extras" tab follow the settings here:
From here the "Joomla Articles" Grid Layout is complete. Repeat these steps for whichever pages need "Grid Layouts"
Creating the Side menu Module
1) From the Control Panel, go to Module Manager.
2) Click the green "New" button in the top left corner.
3) Select "Gantry 5 Particle: This module allows you to add particles to module positions).
4) Give the module the page name - Side menu (e.g. Get involved - Side Menu), change "Show title" to hide, and assign the position to be "SideBar A " under Clarity.
5) Click the grey "Pick a Particle" and select "Block Content". Hit the blue "Select". 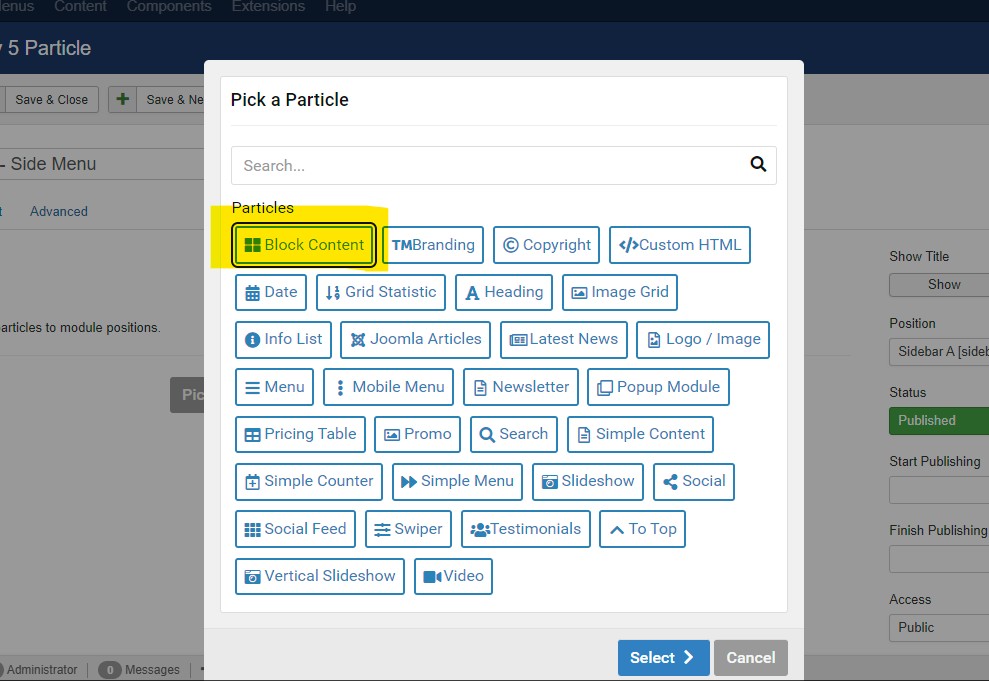
6) In the "Settings" tab, change the Content Source to "Joomla"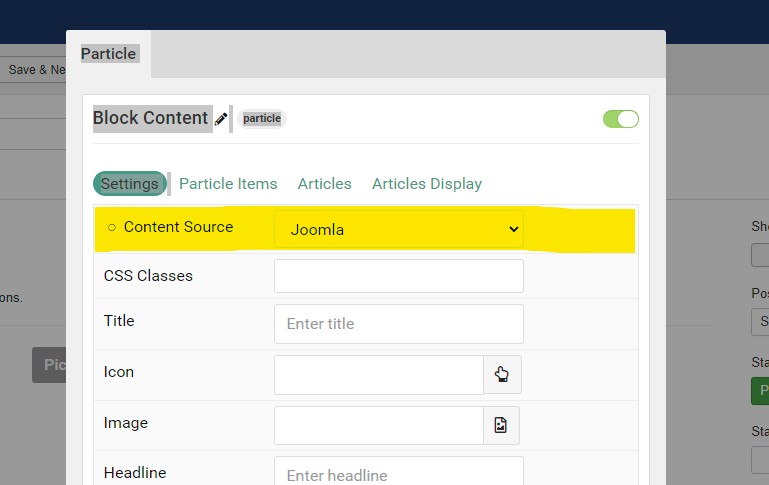
7) Skip to the "Articles" tab. Select your category, delete the information in "Number of Articles" section, change "Order by" to be Ordering.
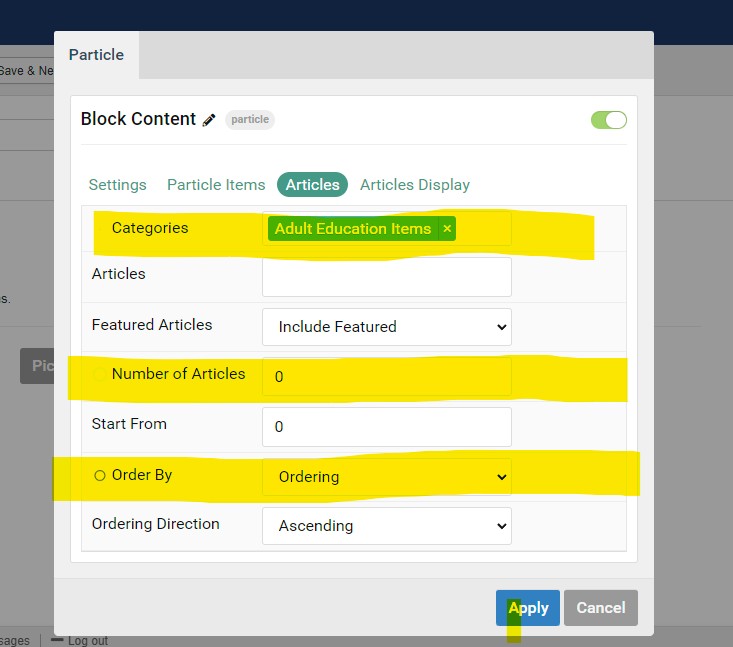
8) Jump to "Article Display" tab. Change the Image section to be "None", Title should be set to "Show", Article Text to "Hide". Hit blue "Apply button".
9) Select the Menu Assignment tab and change from On All pages to Only pages selected. Check the box of the correct menu item (this should be the category blog page).
10) Select the Advance tab and add the following class to the Module Class Suffix.
Class: side-menu-particle
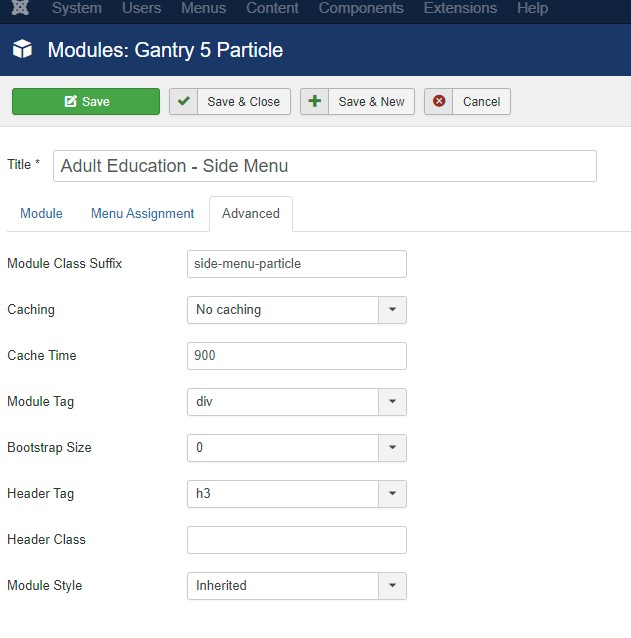
11) Save and close module.
Forms
- Details
- Tori Schippers
Solutio websites support several different types of forms that help parishes and ministries collect information, registrations, and requests directly through their website. These forms can be used for a wide variety of purposes depending on the needs of the parish or organization. Using online forms helps simplify communication, reduce manual data entry, and ensure information is collected in a consistent and organized way for parish staff and administrators.
For security and privacy reasons, Solutio does not create, host, or store forms that collect sensitive personal or financial information. This includes items such as Social Security numbers, bank account details, credit card information, or other confidential financial data. If a parish or organization needs to collect this type of information, it should be done through a secure third-party service specifically designed to handle sensitive data. This policy helps protect both the client and their users by reducing the risk of sensitive information being stored on the website.
Solutio only offers a backend contact form, but has worked with the following;
- Printable forms (most people no longer own printers)
- Fillable PDF
- Google Forms
- PDS Forms (Parish Data Systems)
- JotForms
- Emailmeform.com
- 123Formbuilder.com
- ParishSoft (Online giving/parish registration)
- Realm Church
- EventBrite
- Signup Genius
Ministry Platform Widget Setup
- Details
- Jeremy Meyer
In the spring of 2025, we tried this with StJoe-Middle and minstry platform had conflict with Joomla in that they would append id=123 for a respective event and it would pull up a menu item with that ID.
A year later, here we are and ministry platform seems to have fixed the issue: it is now mpevent=7333 or mpopportunity=2
1. Place the script in the head of the site. Use a raw tags module, in the ganalytics position only assigned to the needed pages.
<script id="MPWidgets" src="/https://stjosephmiddletown.ministryplatform.com/widgets/dist/MPWidgets.js"></script>
2. Per Alex's suggestion, nest these menu items (single article) under a text seperator with the alias /eventapp
3. Either work in code mirror and use articles or create blank single article menu items and assign raw tag module to content top or bottom on that page.
Opportunity Finder:
<mpp-opportunity-finder targeturl="/opportunity-details"></mpp-opportunity-finder>
Event Finder:
<mpp-event-finder targeturl="/details"></mpp-event-finder>
Event Details:
<mpp-event-details returnurl="/events" opportunityfinderwidgettargeturl="/opportunities" checkouturl="invoices"></mpp-event-details>
Invoice and Payment:
<mpp-checkout paymentprocessortargeturl="paymentprocessortargeturl="https://sample.com/paymentform"" backtoeventtargeturl="/events"></mpp-checkout> (REPlACE WITH VANCO URL)
<mpp-user-login></mpp-user-login>
Note the target and return URLS in the respective widgets that will work with the script. Update respectively.
4. Instead of copying every single URL a response back to the client, give them a landing page of sorts: https://www.stjosephmiddletown.com/resources
OR GO ABOVE AND BEYOND LIKE STM-MAN:
https://stmmanhattan.com/my-parish-profile
Option 1: Update the id name in the ministry platform system
The client would need to login to ministry platform and go to the configuration settings. In the configuration settings there are 5 settings that need the value updated. You can find them on their help page:
https://help.acst.com/en/ministryplatform/help-topics/widgets/widgets-release-notes/may-2025#widget-urls-0
Search for them in the configuration settings by "key name" and set the value of each one to "mpid". From there you should be able to add ministry platform widgets to any page as long as the head code is added to that page already.
Here is an example of the head code:
<script id="MPWidgets" src="https://stmmanhattan.ministryplatform.com//widgets/dist/MPWidgets.js"></script>
*This next process should work still but I would try the previous option first
Option 2: Setting Up a Ministry Platform Widget
To integrate a ministry platform widget, all pages hosting the widget (except the homepage) must be nested under the /eventapp URL. This ensures proper functionality for event-related routes, such as:
- example.com/eventapp/checkout
- example.com/eventapp/details
- example.com/eventapp/events
For reference, see ticket: https://catholicwebsiteexperts.freshdesk.com/a/tickets/29196
Implementation Steps
1. Configure Menu Items and URLs
- Create new menu items for pages hosting the ministry platform widget (e.g., Events, Event Details).
- Ensure all widget-related pages are created under the /eventapp/ URL structure, e.g., /eventapp/example-page.
- Add a hidden menu item for /eventapp as the parent.
- Nest subpages (e.g., /eventapp/events) as menu items under the hidden /eventapp parent.
- If the client wants these pages in the main menu, create an additional "Menu Item Alias" type menu item that redirects to the corresponding hidden /eventapp page, preserving the /eventapp URL structure.
2. Share Updated URLs with the Client
- Provide the client with the new /eventapp-based URLs for their widget-related pages.
- Instruct them to update these URLs in their widget settings.
3. Obtain Widget Code from the Client
- Request that the client generates the ministry platform widget code and sends it to you.
4. Insert the Widget Code
- Use a "Raw Tags" module to embed the widget code on the appropriate page. Avoid pasting the code directly into an article, as TinyMCE may strip out custom HTML tags required by the widget.
- Position the module on the page using module positions or load it dynamically with the {loadmoduleid: 123} syntax (replace 123 with the actual module ID and remove the : ).
5. Verify Functionality
- Ask the client to review the implemented widget and confirm that it works as expected.
QuickGalleries & Photo Gallery via FileMan
- Details
- Jackie Riddel
FIX for broken galleries: (happened on Norbertine-Canonesses October 2025) If this happens again, you will see this inside the article: href="null?type=
It can be changed to to look like this: href="quick-galleries/xavier?
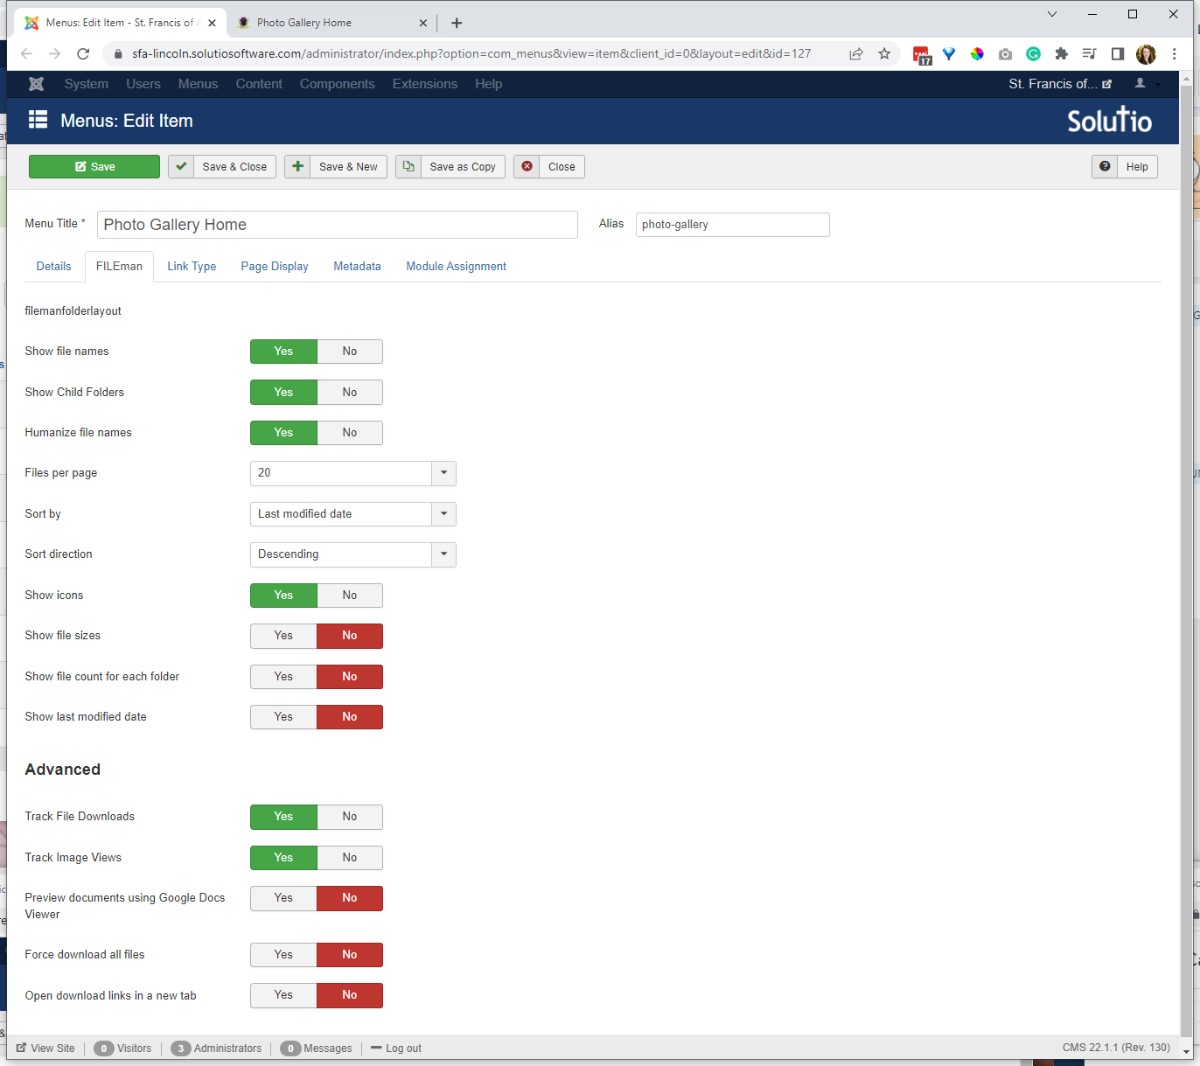
QUICKGALLERIES
-- https://sfa-lincoln.solutiosoftware.com/photo-gallery


IMPORT CONTROL PANEL ICONS:
Control_Panel_Quick-Gallery.csv
and add icons in the fa folder via cyberduck: 
 -- filepath is above stories(root) /images/panel-icons/fa
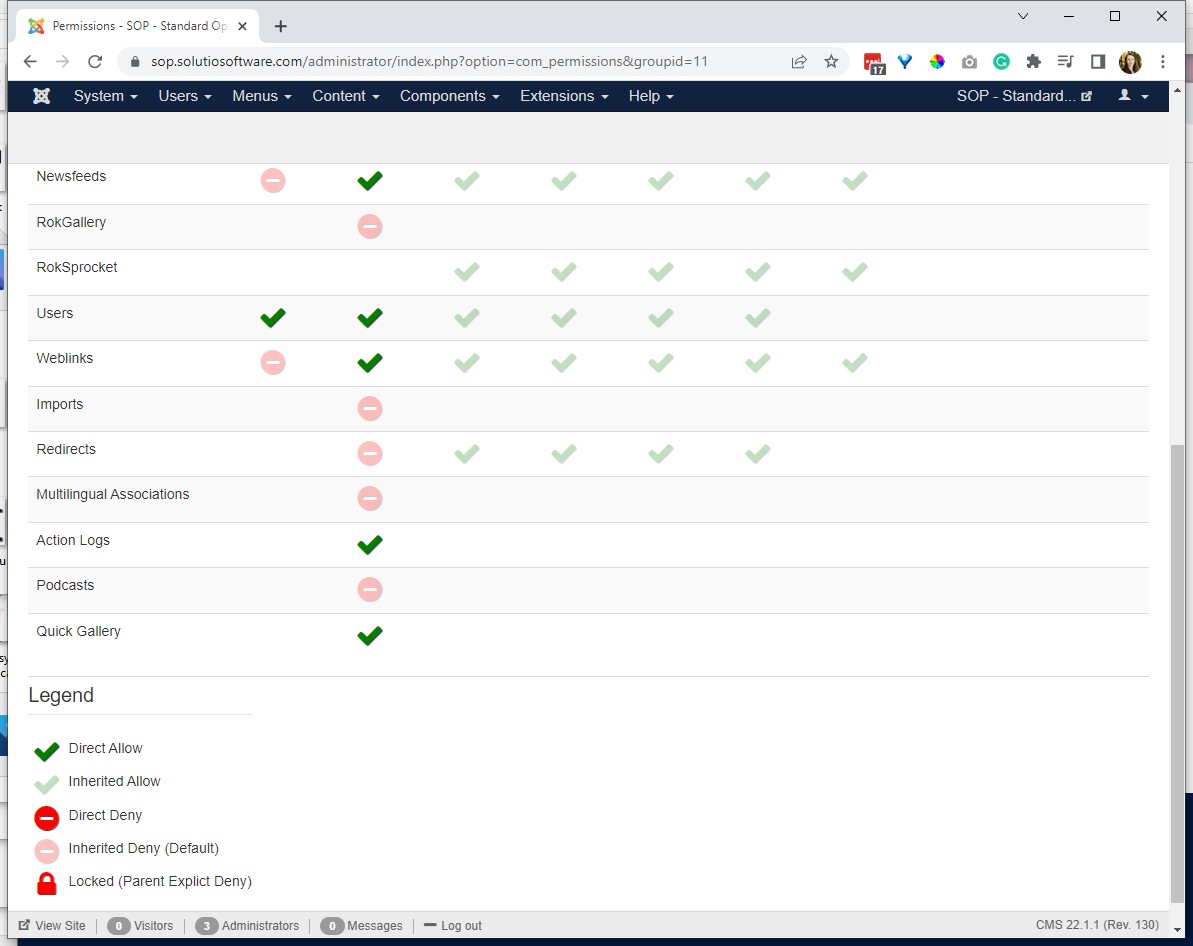
Give Admin permission to the Quick Gallery in the clones (and action logs) 
=================================================================================
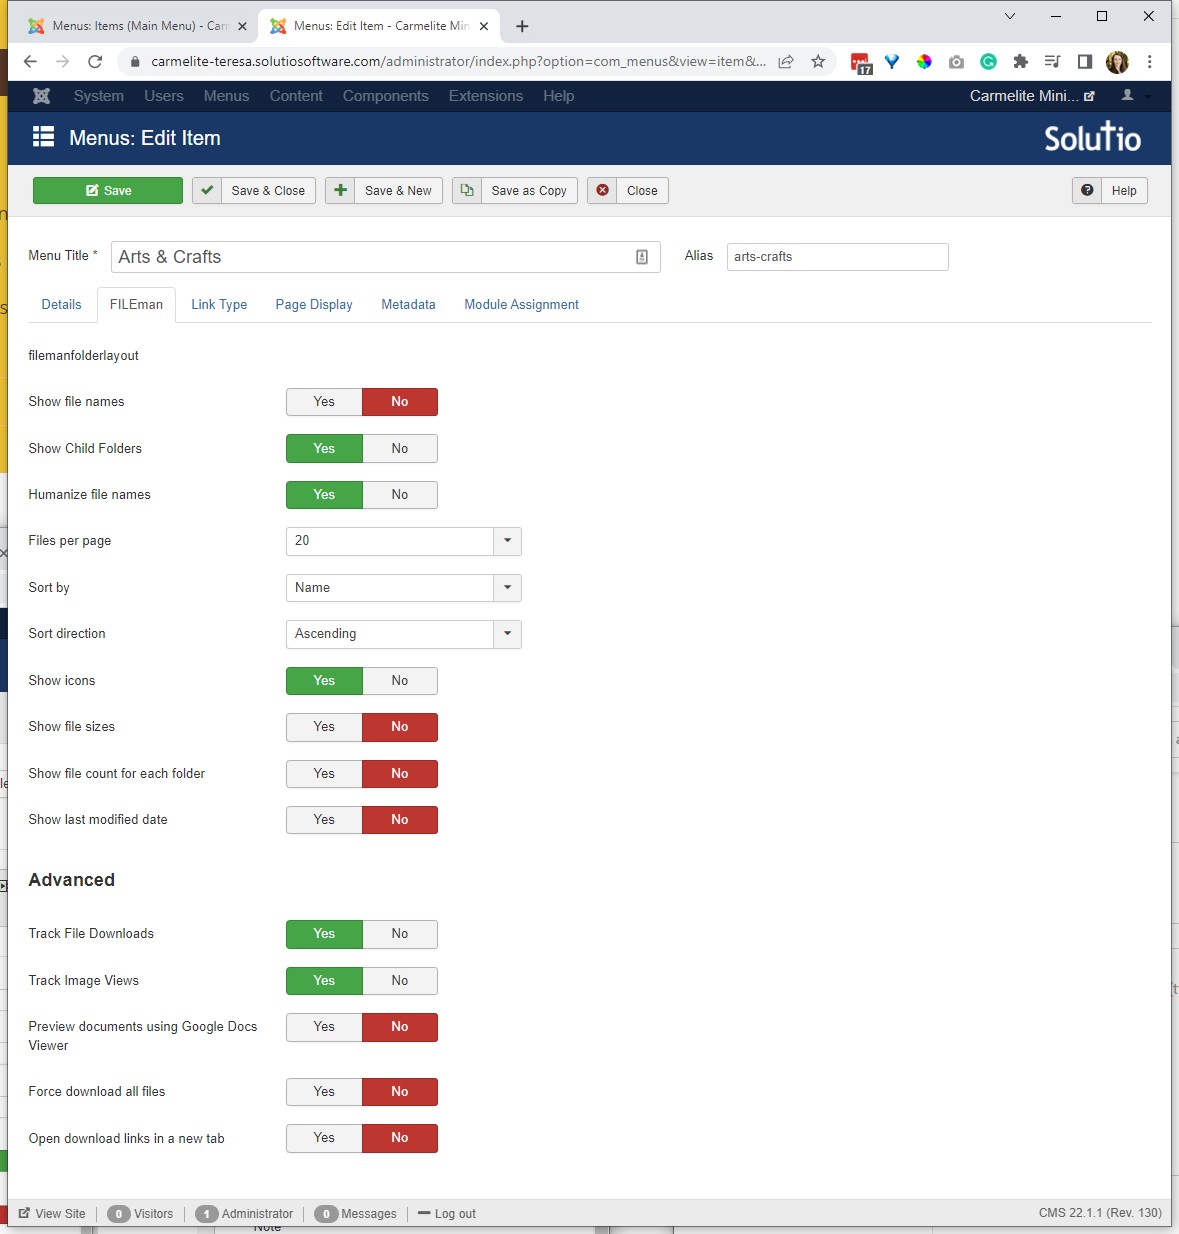
Below is a fileman gallery before Quickgalleries
Examples:
https://stjohn-central.solutiosoftware.com/about-us/galleries
https://sjnlilburn.com/photo-gallery-full
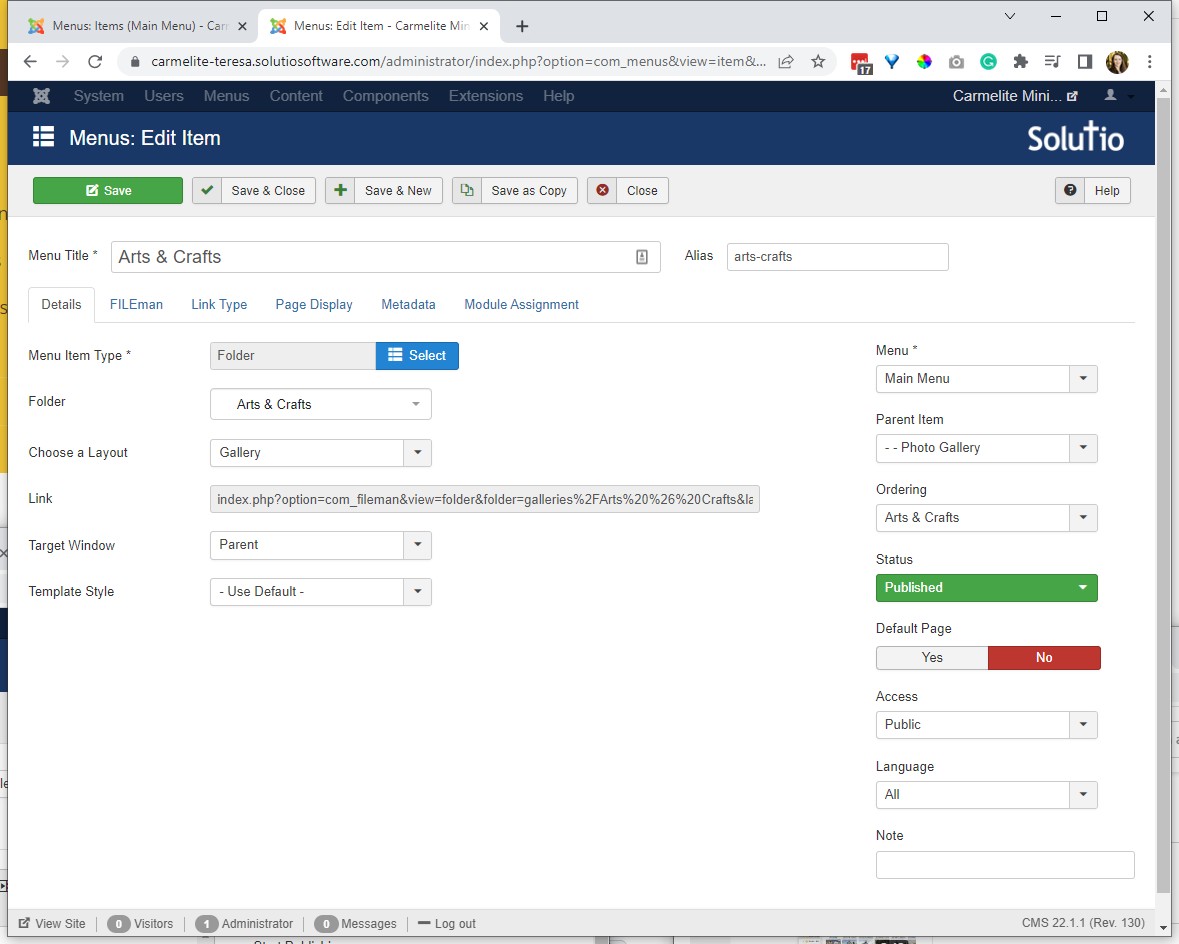
add the page class
add a place here module in content-top-a so the gallery has a title and a description if making a menu item for each 'folder'
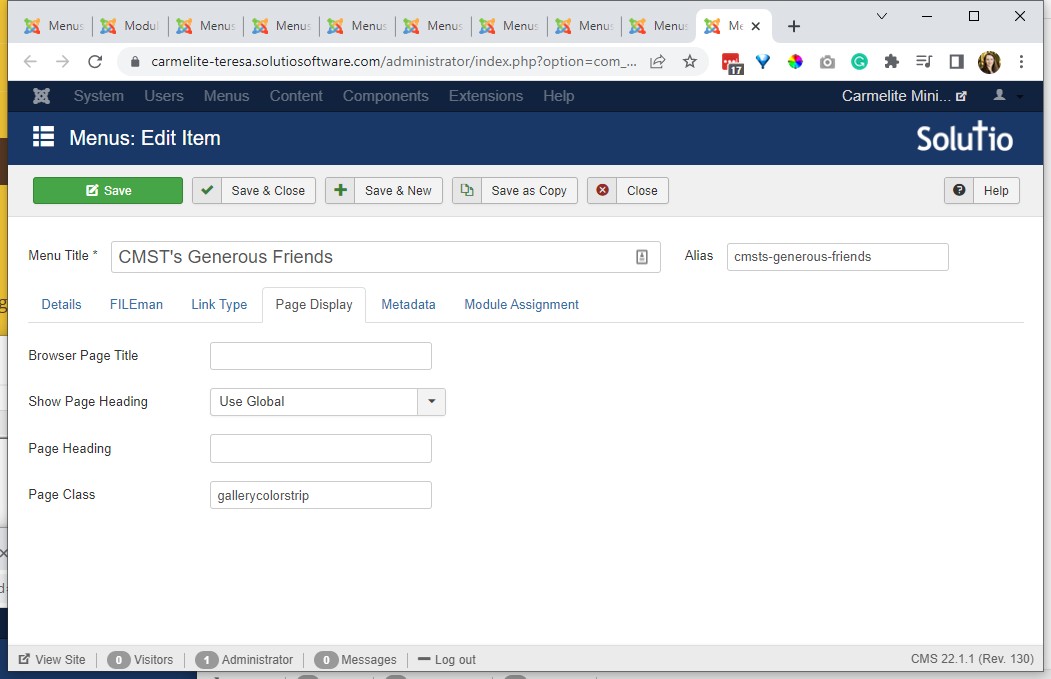
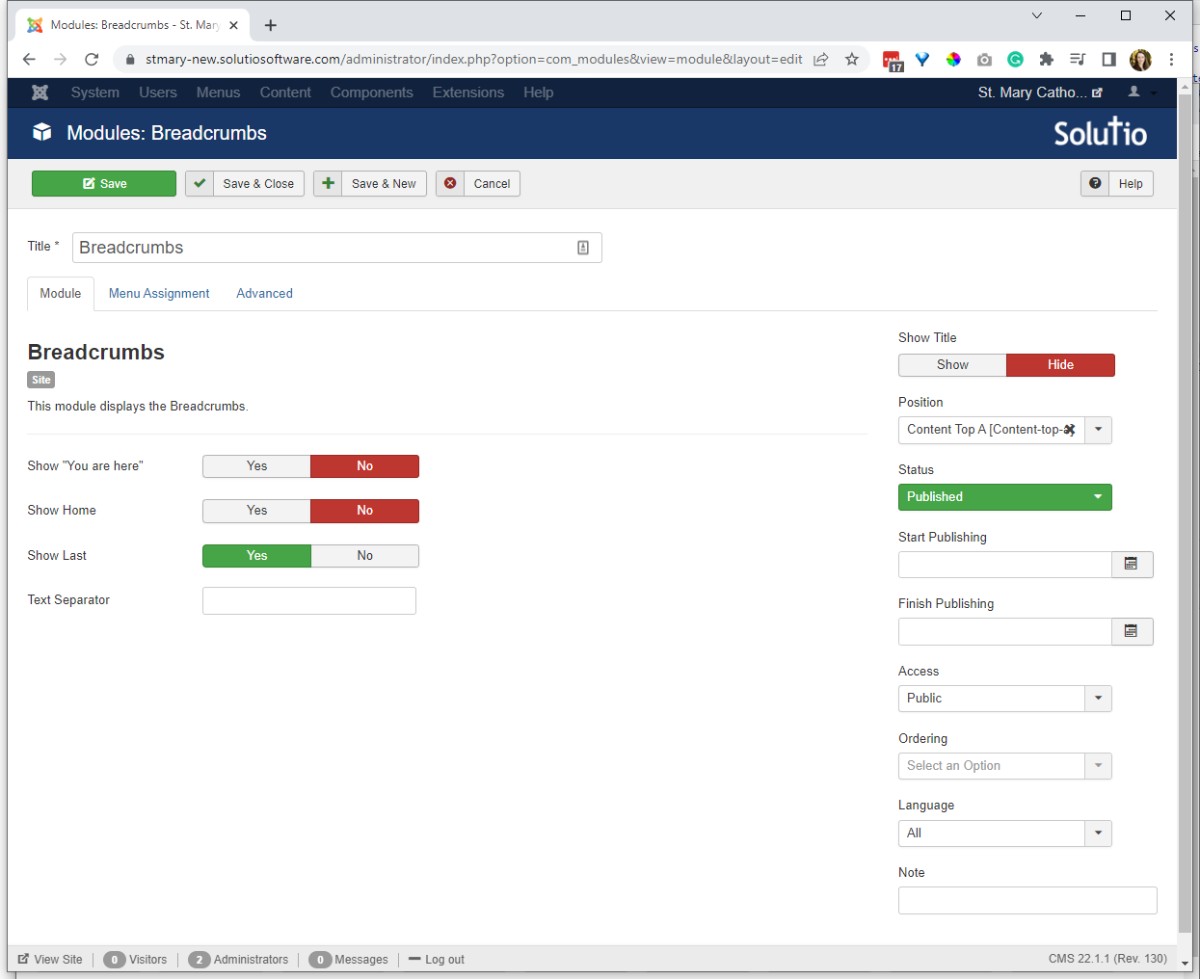
Add Breadcrumbs module in content-top-a